Stone Fruit Crostata

blog peach crostata

Some of my favorite food memories are from my grandparents farm and enjoying all the seasonal joys of the produce. Peach and plum season is on exception. Celebrate the winding down of the summer and the height of the stone fruit and peach season with this delicious crostata recipe. The crust is light, buttery and crisp. The coarse sugar adds a sweet crunch to the crust. The fruit sweet and bursting with flavor. It’s definitely one of the favorite desserts by the bay. You’ll love it!

From by the bay wishing you sweet and crispy crust food memories!

Maryann

Stone Fruit Crostata

Serves 4

Ingredients for Dough

  • 8 tablespoons chilled unsalted butter ( one stick)
  • 1cup , plus 3 tablespoons all purpose flour
  • 2 teaspoons lemon zest
  • 1/2 teaspoon fine sea salt
  • 3 to 4 tablespoons cold water

Ingredients for filling

  • 1 1/2 cups stone fruit such as peaches or plums , pitted and sliced
  • 2 teaspoons cornstarch
  • 2 teaspoons sugar
  • 1 teaspoon lemon juice

To assemble

  • 1 egg
  • 1 tablespoon heavy cream
  • Coarse sugar

Directions

To make dough cube the butter.  In a small bowl combine sea salt and water. Place both the butter and salt water in the freezer for 10 minutes. In a food processor add the flour and lemon zest. Pulse twice. Add the cold butter and pulse 3 to 4 times to incorporate pieces of butter into the flour. Slowly add some water until the dough is a crumb like texture. You may not need all of the water. Place dough onto plastic wrap and fold wrap over to close and push dough together to combine. Flatten into a disk covered with the plastic wrap and let sit in the refrigerator for at least one hour. Meanwhile, make the filling by combining all ingredients in a bowl. Preheat over to 375 degrees F.  Take a piece of parchment paper and place the dough in the center cover with the plastic sheet and use a rolling pin to roll out and fold turn parchment sheet  90 degrees and repeat another 3 times. Roll out the dough on the parchment on the bottom again with plastic wrap over the top of the dough into a round approximately 1/8 inch thick. Spoon the filling in the center of the round leaving a 1 inch border all around. Fold the edges over the filling partially covering around the border. Place parchment with pie carefully onto a baking sheet and place in the refrigerator to chill for 15 minutes. In a small bowl whisk together the egg and cream to make the wash. Remove from the refrigerator and brush the egg wash on the edges of the pie. Sprinkle with coarse sugar and place into oven. Bake for 40 to 45 minutes until the crust is brown and the fruit is bubbling. Remove from oven and let cool 10 minutes. Slide carefully onto a serving platter. Serve warm or at room temperature.

Quick and Easy Blackberry Jam

blog blackberry jam 2

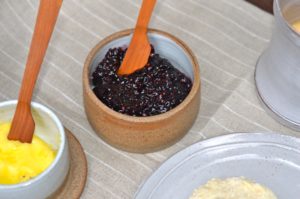
Wait don’t throw out those berries!  Sometimes, I have left over berries in my fridge, yes hard to imagine but true. If you find that you have berries that are maybe not at peak left over , consider making this quick berry jam recipe. I used blackberries because  they were what I had left over but easily you could be using raspberries, blueberries or strawberries. I have been know to just use whatever I might have left over. It’s so simple to make the green apple supplies the pectin to make the jam and voila you have your very own homemade fridge jam. Serve along with your favorite biscuit, toast or pancakes!

From by the bay wishing you a very jammy food memory!

Maryann

P.S. I love the blackberry version of this jam!

blog blackberry jam 1

Quick and Easy Blackberry Jam

Ingredients

  • 12 ounces fresh blackberries
  • 1 cup granulated sugar
  • 1/4 cup cored, peeled and chopped granny smith apple
  • 1 tablespoon fresh lemon juice

Directions

Wash blackberries and pick over for any impurities. Place ingredients in a medium pan on low heat and mix well. Heat slowly for approximately 40 minutes stirring occasionally, until jam comes to a rolling boil. Test to see if jam has thickened by using a spoon to see that it doesn’t run. You can mash the berries or leave the larger pieces. If it’s a little runny no worries it will jell in the fridge. Place in a jam jar and cover. Store in the refrigerator until ready for use for up to one week.

Grilled Eggplant with Creamy Tahini Dressing

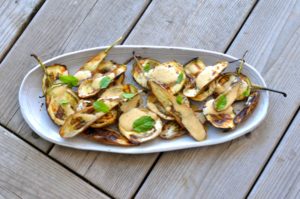
Here is a recipe to make use of the abundance of delicious eggplant available this time of year. i like to use petite heirloom eggplant such as  fairy tale or Japanese for this recipe, although you can use the larger purple eggplant if that is what is available just slice lengthwise in 1/4 inch to 1/2 inch slices. This is a great side dish, I love serving with grilled baby lamb chops, especially if you use the same tahini sauce drizzled on top of your grilled chops. Sublime!

From by the bay, wishing you yummy eggplant food memories!

Maryann

blog eggplant tahini

Grilled Eggplant with Creamy Tahini Dressing

Ingredients

  • 2 pounds assorted Japanese or fairy tale eggplant
  • 1/4 cup tahini
  • 3 tablespoons lemon juice
  • 4 tablespoons olive oil
  • 1/2 teaspoon cumin
  • 1/8 teaspoon cayenne pepper
  • 1/2 teaspoon fine sea salt
  • 1/4 teaspoon fresh ground black pepper
  • 1 teaspoon mint leaves to garnish

Directions

To make dressing

Whisk together tahini, lemon juice, 2 tablespoons olive oil, cumin, cayenne, and ¼ cup water until smooth. Add salt and pepper and whisk again.

To prepare eggplant

Cut eggplant into lengthwise slices, depending on your width you can cut in half or into widths of 1/4 inch to 1/2 inch. Coat with the additional olive oil. Grill on a medium heat until eggplant starts to brown 1 to 2 minutes and then flip to brown the other side. Pull off the heat and place on a platter. Sprinkle with salt and pepper and then drizzle with the tahini dressing. Garnish with chopped mint. Serve immediately or at room temperature within the hour.


Tomatoes and Peaches with Ricotta and Fried Almonds

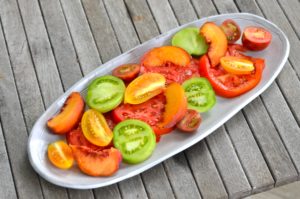
Heirloom tomatoes are not only delicious to eat, they are a true feast for the eyes. I love the wide variety of colors and shapes. I decided to deviate from my favorite salad of tomato, mozzarella and basil to this combination or tomato, peach, ricotta and tarragon. You will love this variation, especially if you find a good quality store bought ricotta cheese. If you are ambitious try making your own ricotta cheese it’s really simple.  My recipe is included below. I made my own ricotta for this salad because I had a large container of whole milk about to hit the expiration date. I didn’t want the milk to go to waste and I can’t think of a better use than making fresh ricotta cheese. The peaches add some sweetness to the salad and frying a few almonds in olive oil adds some needed crunch. This is a new favorite for my summer dining!

From by the bay, wishing you sunny tomato and peach food memories!

Maryann

blog peach salad 2

Tomatoes and Peaches with Ricotta and Fried Almonds

Serves 4

Ingredients

  • 2 pounds mixed heirloom tomatoes, some sliced and some halved
  • 2 large ripe peaches, pitted and sliced
  • 1/4 cup whole unsalted roasted almonds
  • 1/4 cup olive oil
  • 2 tablespoons sherry wine vinegar
  • 1/2 cup fresh ricotta ( homemade or store bought) recipe below
  • 2 teaspoons tarragon leaves
  • fine sea salt and fresh ground black pepper to taste

Directions

On large platter arrange the tomatoes and peaches. Dot the ricotta on top of the tomatoes and peaches. In a small skillet heat the olive oil and add the almonds. Stirred until almonds are heated and start to sizzle. Remove from heat and cool to room temperature before adding the sherry vinegar. Mix  together. Drizzle dressing over the tomatoes and peaches. Dot the ricotta cheese on top. Add salt and pepper to taste. Sprinkle with tarragon leaves.  Serve immediately.

blog ricotta 2

Homemade Ricotta Cheese

Ingredients

  • 3 cups whole milk
  • 1 cup heavy cream
  • 2 tablespoons white vinegar
  • 1 teaspoon fine sea salt

Directions

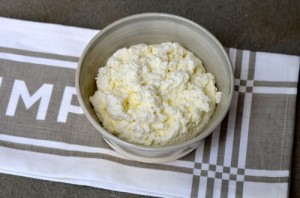
Line a sieve with a dampened cheesecloth and place over a bowl to strain the cheese. Place all the ingredients in a saucepan over medium heat. Bring to a full boil, stirring occasionally. The mixture will start to separate in curds ( the thick part that is the cheese) and whey ( the thin liquid you drain off). Once that happens, pour into the sieve, catching the ricotta into the cheesecloth lined sieve. Let stand for 20 to 25 minutes letting the liquid drain off. Let drain depending how thick and moist you want. the longer it drains the thicker and drier the ricotta. Once drained, take the cheese out of the cheesecloth and store in a container in the refrigerator until ready to use. This will stay 3 to 4 days.

Variations – all good and I’ve made and enjoyed each one depending on the ingredients on hand. 

  • Use only whole milk for a slightly less creamy version, this is great if you don’t have any heavy cream.
  • Replace the heavy cream with buttermilk, don’t use any vinegar for a drier textured ricotta, good for cooking

blog peach salad 1

Fresh Corn and Tomato Cilantro Salsa

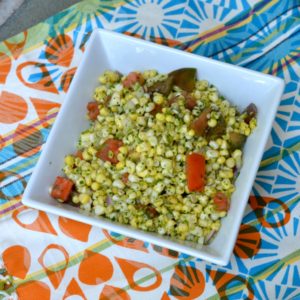
It’s one of my favorite times of year! Farm stands are filled with the freshest local product , picked in the morning and by late afternoon, I have prepared something for dinner. What I most look forward to is the local corn and tomatoes. This is a quick and easy salsa I made marrying my two favorite summer vegetables into a great salsa, dressed with cilantro and lime. This recipe uses fresh raw corn, fresh and sweet, cut from the cob. The recipe works best when the corn is fresh. I like to use heirloom tomatoes if I can find them and then I make a simple dressing which is much like a pesto using cilantro, although basil would work as well. You can serve this with chips along with you evening cocktail or it makes a perfect side dish. Enjoy!

From by the bay wishing you some lovely salsa food memories!

Maryann

blog corn salsa

Fresh Corn and Tomato Cilantro Salsa

Serves Six

Ingredients

6 ears of corn

1/2 red onion, finely chopped

2 tomatoes, seeded and chopped

2 cloves garlic minced

1 cup cilantro

1/2 cup olive oil

juice and zest of two limes

1 teaspoon honey

1/2 jalapeno, seeded and chopped

2 teaspoons fine sea salt

1/2 teaspoon fresh ground black pepper

Directions

Remove silk and husks from corn. Cut corn off cob and place in a medium bowl. Add red onion, tomato and lime zest. In a blender or food processor add garlic, cilantro, honey, jalapeno, olive oil, lime juice , salt and pepper. Blend until smooth. Pour over corn and tomatoes and mix well. Adjust salt and pepper to taste and serve at room temperature.

blog corn salsa 2

Ricotta Stuffed Pattypan Squash

blog pattypan


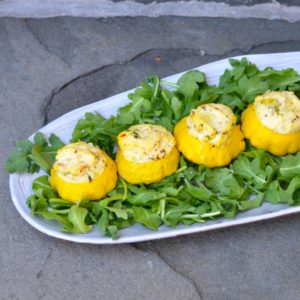
I love how cute pattypan squash looks. I can’t resist food this pretty and cute. So I found myself faced with a bag of pattypan squash along with the question, how should I prepare this sweet little vegetable.  My answer was no further than preparing my favorite filling for zucchini flowers and adding an egg and some cheese to make it firmer. A quick bake in the oven and you have the perfect little appetizer. If you find tiny ones the stuffing will fill more than 12 , think of this as a summer version of a stuffed mushroom. Or you can serve slightly larger pattypans on a bed of lightly dressed greens as a first course, or a light summer lunch or dinner. Enjoy!

From by the bay , wishing you cute pattypan food memories!

Maryann

blog pattypan veg

Ricotta Stuffed Pattypan Squash

Serves Six

Ingredients

12 small patty squash

2 tablespoons olive oil

Ingredients for filling

1 cup whole milk ricotta cheese

1 tablespoon mint, finely chopped

1/2 teaspoon thai red chili, minced

1/2 teaspoon lemon zest

1/4 cup grated parmesan cheese

1/2 teaspoon fine sea salt

1/4 teaspoon fresh ground black pepper

1 egg

Optional: Dress with additional olive oil and flake sea salt such as Maldon

blog pattypan scoop

Directions

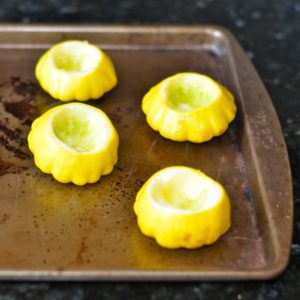
To prepare squash rinse and cut off the tops with stem leaving approximately 3/4 of the squash remaining on the bottom. Use a teaspoon and gently scoop the flesh and seeds making a small circular hole. Make sure not to break the remaining outside of the squash. Preheat oven to 400 degrees F. Line a baking sheet with foil. In a small bowl mix the ingredients for filling until blended.  Brush each squash with olive oil. Place on the foil lined baking sheet, sprinkle with salt and pepper. Use a teaspoon to fill each squash with cheese filling. Cover with aluminum foil and bake for 30 minutes. Remove the foil and bake for approximately 5 minutes longer to brown the tops of the filled squash. Remove from oven. Serve warm or room temperature on a bed of you favorite lightly dressed greens, such as arugula.  Once the pattypans are assembled on the lettuce drizzle lightly with additional olive oil and sprinkle with flake sea salt.


Watermelon Gazpacho

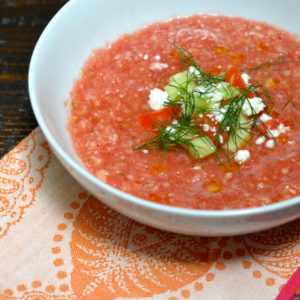
One Monday after a weekend of entertaining I eyed in my fridge some leftover Greek salad I had made using some watermelon along with the traditional tomato and feta cheese. I decided to just blitz the leftovers in the blender resulting in a wonderful combination of flavors. It was a perfect marriage of flavors. I decided to continue to play with the ingredients adding the cucumber and jalapeno as I would in any gazpacho I would make. The cucumbers also help balance the soup from tasting too sweet. You’ll love this recipe. If you are in a rush you can save alot of time by buying your watermelon already cut and ready to go. This is a refreshing dinner for a hot summer evening!

From by the bay, wishing you cool watermelon food memories!

Maryann

blog watermelon gazpacho

Watermelon Gazpacho

Ingredients

1 large tomato, seeded and coarsely chopped

3 cups watermelon, cubed and seeded

1 english or hot house cucumber, peeled, seeded and cubed

1 tablespoon jalapeno pepper, seeded and chopped

2 tablespoons red onion chopped

2 teaspoons red wine vinegar

1 teaspoon fine sea salt

1/2 teaspoon black pepper

To serve:

1/4 cup crumbled feta cheese

fresh dill

olive oil to drizzle

flake sea salt such as Maldon

optional: additional cucumber and tomato cut into 1/4 inch cubes for garnish

Directions

In a food processor or blender puree tomato, watermelon and jalapeno. Add remaining ingredients ( onion, vinegar, salt and pepper) and blend until smooth. Chill and serve by drizzling the top with olive oil. Add crumbled feta cheese and optional additional chopped cucumber and tomato. Sprinkle lightly with dill and sea salt. Enjoy!


Pickled Strawberries

blog pick straw 1

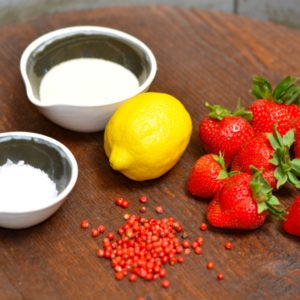
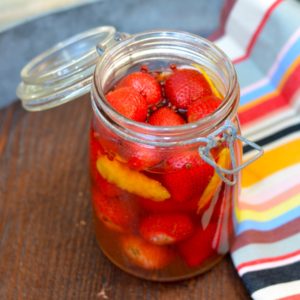
Loving strawberries the way I do , I was looking for ways to extend my enjoyment of our brief strawberry season. Pickled strawberries are a perfect solution. It may sound strange at first but pickled strawberries are the perfect balance of sweet and sour! For my pickled recipe I included some lemon rind for taste and red peppercorns for mild heat and a slight pepper taste. Now you must be wondering where I might use some pickled strawberries here is a list of some of my favorite uses:

  • chopped into salads
  • cocktails, such as sangria or champagne cocktail to name a few
  • a favorite salsa recipe
  • on top of vanilla ice cream
  • mixed with stone fruit as a fruit salad or pie filling
  • flavor a wine vinegar

Great creative and enjoy!

From by the bay , enjoy your pickled food memories!

Maryann

blog pick straw 2

Pickled Strawberries

Ingredients

  • 1 pound ripe but firm strawberries, hulled, halved if large
  • 4 strips lemon peel
  • cups white balsamic vinegar
  • ¼ cup natural cane sugar
  • 1/2 teaspoon pink peppercorns
  • 2 tablespoons sea salt

Directions

Remove stems from strawberries. Place strawberries and lemon peel in a 1-qt. heatproof jar. Bring vinegar, sugar, salt, peppercorns,  and 1/2 cup water to a boil in a small saucepan over medium heat, stirring to dissolve sugar and salt. Pour over strawberries. Let cool; cover and chill. The strawberries will keep 5 days in the refrigerator.

Festive Red Beet Hummus

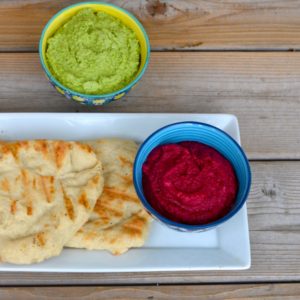
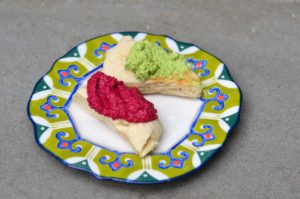
Looking for festive foods to add to your 4th of July holiday menu?   Try this recipe for red beet hummus. This is unique hummus is a feast for both the eyes and your taste buds. A slow braise of the beets in the oven makes this easy to prepare along with your food processor. I love the pink red vibrant color!

From by the bay, wishing you festive 4th of July food memories!

Maryann

blog beet hummus

Beet Hummus

Makes 4 cups

As seen in Food and Wine Contributed By Eli Sussman and Max Sussman  Published June 2016
Ingredients
  • 2 pounds red beets, scrubbed
  • 2 garlic cloves, chopped
  • 2 tablespoons ground coriander
  • 1 tablespoon fresh lemon juice
  • 1/2 cup extra-virgin olive oil
  • 3/4 cup tahini
  • Kosher salt
  • Warm pita bread, for serving

blog beet hummus 2

Directions

Preheat the oven to 425°. In a medium enameled cast-iron casserole, cover the beets with water and bring to a boil. Cover and braise in the oven for about 2 hours, until very tender. Using a slotted spoon, transfer the beets to a cutting board. When cool enough to handle, slip 
off the skins. Cut the beets into 1-inch pieces, spread them on a baking sheet and refrigerate until cold, about 1 hour. In a food processor, combine the braised beets with the garlic, coriander and lemon juice and pulse until finely chopped. With the machine on, slowly drizzle 
in the olive oil until incorporated and the beet puree is smooth. Scrape into a bowl and whisk in the tahini. Season with salt and serve with pita bread.

Rib Eye Steak with Pineapple Marinade

Give you marinade a tropical twist using pineapple juice for sweetness balanced with little soy for a salty taste. Red Thai chiles  add a little heat countered with the coolness of fresh chopped ginger. It’s so simple to prepare and adds some much flavor to your steak. You could use this marinade with chicken or pork chops just as easily. Enjoy!

From by the bay, wishing you tropical food memories!

Maryann

blog pineapple steak

Rib Eye Steak with Pineapple Marinade

Serves 4

Ingredients

4 rib eye steaks

2 cups pineapple juice

1/2 cup low sodium soy sauce

1/4 cup light brown sugar

2 teaspoons sesame oil

2 tablespoons chopped fresh ginger

3 garlic cloves chopped

1/4 cup chopped scallions

1 fresh thai red chili, chopped ( approx. 1 tablespoon) or 1/2 teaspoon dried red chili flakes

Directions

Combine soy sauce, pineapple juice, sesame oil and brown sugar stirring until sugar dissolves in a large zip-top plastic freezer bag, set in a baking dish.  Add ginger, garlic, chili and scallions. Add steaks. Seal bag, and  massage steaks carefully in the marinade. Chill at least 4 hours or up to overnight, turning occasionally. Remove steak from marinade, discarding marinade. Grill steak, covered with grill lid, over medium-high heat (350° to 400°) 5 minutes on each side or to desired degree of doneness. Let stand 10 minutes before serving.

Optional: Serve with grilled skewers of pineapple and red onion