Monthly Archives: May 2014

Rosemary Sandcake

blog sandcake

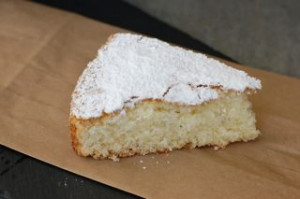
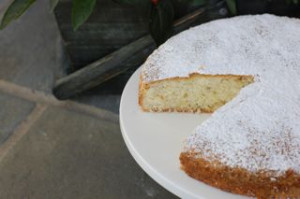
Not long ago I was looking for a light easy dessert to complete a meal celebrating the end of summer. I stumbled on this recipe in one of my many cookbooks. The name of the cake was the first draw.  I love rosemary and grow it right outside my kitchen door. Second, sand cake reminds me of the beach. As I read the recipe I was intrigued.  I had never used potato starch in my baking before. I found that using the potato starch made for an interesting soft texture, that crumbles slightly but remains moist. This is one spectacular cake! It has a lovely lemony taste with just a hint of rosemary. Michael Chiarello suggests that this cake be eaten the day that you make it, so I will too, although there really was no cake left to see how it tastes the second day. I’m sure you will enjoy this cake as much as we did here by the bay.

From by the bay , wishing you sandy food memories!
Maryann

blog sand cake 2


Rosemary Sandcake
Recipe: Michael Chiarello from “Casual Cooking Cookbook”
IngredientsCake
Unsalted butter and unbleached all-purpose flour for the cake pan
1 1/3 cups sifted potato starch (not potato flour)
1 1/2 teaspoons baking powder
1 cup (1/2 pound) unsalted butter, at room temperature
1 cup plus 1 tablespoon superfine sugar
3 eggs, separated
2 tablespoons grated lemon zest
1 tablespoon finely minced fresh rosemary
1/2 teaspoon pure vanilla extract

For serving:
Confectioners’ sugar
3 pints mixed summer berries or 6 peaches, peeled and sliced, or a combination
Granulated sugar
Lightly whipped heavy cream

Directions

Thoroughly butter the bottom and sides of a 9-inch round cake pan with 2-inch sides. Line the bottom with a round of parchment paper. Coat the sides of the pan with flour, shaking out the excess.Make the cake: Sift the potato starch and baking powder into a bowl. In an electric mixer, cream the butter until smooth. Add the 1 cup sugar gradually, beating until well blended. Add the egg yolks one at a time, beating well after each addition and scraping down the sides of the bowl once or twice. Beat in the lemon zest, rosemary, and vanilla. By hand, stir in the dry ingredients just until blended.

Beat the egg whites and the remaining 1 tablespoon sugar to soft peaks. Fold half of the beaten whites into the potato starch mixture to lighten it, then gently fold in the remaining whites. Transfer the batter to the prepared pan, leveling it with a spatula.

Place in a cold oven and turn the thermostat to 350ºF. Bake until the cake is well risen, nicely browned, and beginning to pull away from the sides of the pan, 50 to 55 minutes. Let cool completely in the pan on a rack, then invert onto the rack and carefully remove the parchment paper. Invert again onto a serving platter. Put the confectioner’s sugar in a sieve and dust the surface of the cake lightly with it.

Thirty minutes before serving, put the fruit in a bowl, add granulated sugar to taste, and crush the fruit with a fork until it is roughly mashed. Let it stand 30 minutes to render some juice.

Cut the cake into 12 slices. Serve a slice of cake with crushed fruit spooned over and around it and a dollop of whipped cream on the top or alongside.

Concord Grape Ice Cream

blog grapes

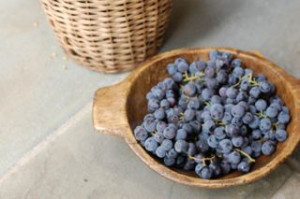
When I start to think about fall and september will do that to you, I often remember picking Concord grapes on my grandparents weekend farm. I loved the scent and color of these deep purple grapes. Concord grapes are not easy to find.  They originated in the 1800’s in Concord Massachusetts. Today, these grapes are primarily found in New York, Massachusetts and the Pacific Northwest.  I find them briefly in the farmer’s markets or a few specialty stores. Almost every knows this grape from Concord Grape Jelly, but I have found not many people buy these grapes fresh. I think it’s the fact that the grapes are loaded with seeds, but the delicious grape flavor is worth the trouble with the seeds.


blog concord ice cream

Concord Grape Ice Cream
Makes approximately 1 1/2 quarts

Ingredients
2 pounds Concord Grapes, stemmed
1 cup whole milk
2 cups heavy cream
3/4 cup superfine granulated sugar
pinch fine sea salt
optional: Concord Grape Jelly

Equipment: ice cream maker

Directions
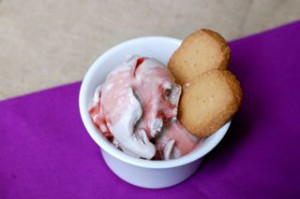
Puree half the grapes in a food processor until smooth. Take a medium bowl and place over it a fine sieve, pressing the mixture into the mesh with the back of a spoon. Discard the solids remaining in the sieve. Repeat process with the remaining grapes. You should have approximately 1 1/2 cups grape juice. In a medium sauce pan place the milk, cream, sugar and salt. Heat and stir until the sugar is dissolve. Pour into bowl with the grape juice and blend. Cover with plastic wrap and chill in the refrigerator for at least 4 hours. Freeze in an ice cream maker according to directions and then place in an airtight container and put into the freezer to firm up for at least 3 hours. Serve plain or melt a few tablespoons of concord grape jelly in the mircowave for 30 seconds. The jelly will turn into a syrup you can then spoon over the ice cream. Serve along with peanut butter shortbread.

Peanut Butter Shortbread
Makes 36 small cookies

Ingredients
8 tablespoons softened unsalted butter ( 1 stick)
1/4 cup confectioner’s sugar
1/2 teaspoon vanilla
1 1 /4 cup all purpose flour
1/2 teaspoon fine sea salt
1/3 cup smooth peanut butter

Directions
Using the paddle attachment of an electric mixer, beat the butter,sugar, vanilla and salt until creamy and light, about 2 minutes. Place mixer on low speed and add the flour. Once combined add the peanut butter and blend well. Remove from the bowl and divide the dough into two and place onto two sheets of plastic wrap. Shape each into a log about 3/4 inch thick. Wrap into the plastic and place into the refrigerator to chill for 2 hours. To bake, preheat oven to 350 degrees F. Unwrap logs and slice into 1/4 inch rounds using a serrated knife. Arrange slices onto a baking sheet about an inch apart. Bake for 10 to 15 minutes until light brown at the edges. Cool baking sheets for a minute and then transfer cookies to rack to cool completely.

Pasta with Roasted Summer Vegetables

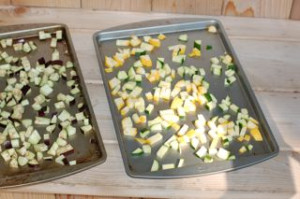
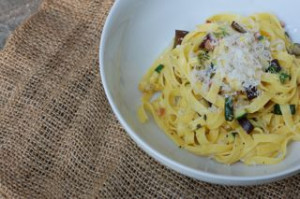
It’s after Labor Day, and the signs of fall are sadly arriving everywhere. Acorns are dropping onto the deck, leaves are gently falling into the pool, evening’s are getting a little cooler and the farmer’s market stalls are starting to fill with up with chrysanthemums and gourds. I am determined to savour the end of summer by snapping up in my shopping basket eggplant and summer squash. Once I arrive home, I enjoy the task at hand , figuring out what I’ll make with all that eggplant and squash. I came up with this easy pasta dish , which is light and delicious and uses alot of fresh eggplant and squash. Roasting vegetables in a little olive oil , can make the most finicky eater love vegetables. I chopped the vegetables into nice little cubes, toss with a little olive oil, thyme, salt and pepper and roast in the oven. Next, I saute until crisp some great quality slab bacon or pancetta also cut into cubes. Cook some pasta and use some grated cheese and you have a fantastic meal. Enjoy your last days of summer with some fresh vegetables and savour the moment!

From by the bay, wishing you memorable end of summer food memories!

Maryann

blog summer veggies
Pasta with Roasted Summer Vegetables
Serves Four
Ingredients
8 ounces dried pasta such as tagliatelle or thin spaghetti, cooked according to directions.
2 cups cubed eggplant
2 cups cubed assorted summer squash, such as zucchini
2 tablespoons olive oil
1 tablespoon fresh thyme leaves
4 ounces chopped good quality pancetta or slab bacon, cut into cubes
1 cup grated parmesan cheese
1 cup cooking water from pasta
fine sea salt and fresh black pepper to taste
Directions
Preheat oven to 400 degrees F. Dice your eggplant and summer squash into cubes, approximately 1/4 inch in size. Dice your bacon or pancetta into similar size cubes. Line two roasted pans with foil. Place the eggplant cubes on one pan and toss with 1 tablespoon olive oil, coating the cubes. On the second pan add the squash, thyme and remaining olive oil. Toss well coating the squash. Place both pans in the oven and roast in the oven for about 20 minutes until the vegetables become soft and start to brown. Watch the vegetables as cooking time could vary depending on the cube size. Remove from oven and place in bowl and keep to the side. While the vegetables are roasting in the oven take a medium saute pan and add the pancetta or bacon and cook until crisp. Drain on a paper towel. Cook the pasta according to directions. Just before straining the cooked pasta, reserve 1 cup of cooking water. Place the pasta in a bowl , add the roasted vegetables, bacon and cheese. Add some of the cooking water to make the sauce creamy. Add salt and pepper to taste and serve immediately.


blog zucchini pasta

Zucchini Salad with Toasted Pine nuts and Shaved Asiago Cheese

blog zucchini

Zucchini Salad with Toasted Pine nuts and Shaved Asiago Cheese
Serves Four
Ingredients
2 medium size zucchini
1/4 cup olive oil
juice of 1 lemon
1 teaspoon coarse sea salt, such as Maldon
1/4 teaspoon fresh ground black pepper
2 tablespoons pine nuts
2 tablespoons basil
Asiago cheese , shaved to taste
Directions
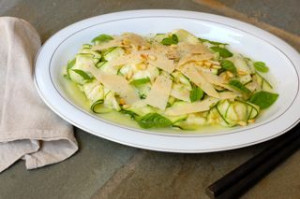
Place a dry small pan on medium heat, add the pine nuts and toast in pan until they start to brown. Remove from heat and keep to the side. Take the zucchini and cut off the ends. Use a mandolin or box grater to slice thinly the zucchini length wise. Place on platter. Dress with the olive oil,  lemon juice, salt and pepper. Mix well. Let sit at room temperature for at least 1 hour before serving, allowing the zucchini slices to marinate. When ready to serve, top with the pine nuts, basil torn into pieces and the shaved Asiago cheese and then serve.

blog zucchini salad


Julia’s Crabcakes with Cilantro Mayonnaise

blog best ever


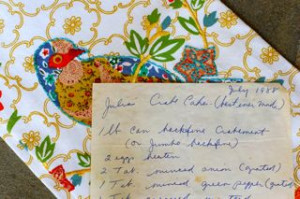
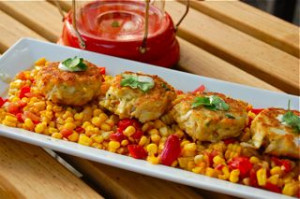
Each summer our family would visit my mother’s sister Julia and her family at the Jersey shore. It was a big treat for all of us. We would spend our time running around outdoors and then come in to a wonderful meal. What better summer seaside meal then crabcakes. My aunt served them with tartar sauce and lemon.  So when my mom finally got around to getting the recipe, she named the crabcake as Julia’s Crabcakes (best ever made). This is no exageration. I didn’t  touch my aun’t recipe for the crabcakes. How can you improve on the best ever made?  I did add some cilantro mayonnaise and placed on a bed of sauté red peppers with fresh corn,  Yum!

From by the bay wishing you the best ever made food memories!
Maryann

blog crabcakes


 Julia’s Crabcakes with Cilantro Mayonnaise

Serves 4

1 lb lump crabmeat, pick for cartilage

2 eggs beaten

2 tablespoons finely chopped onion

1 tablespoon finely chopped red bell pepper

1 tablespoon prepared mustard

¼ teaspoon Worchester sauce

½ cup bread crumbs

3 tablespoons mayonnaise

Juice of ½ a lime

½ teaspoon black pepper

6 tablespoons unsalted butter

Cilantro leaves to garnish

Directions

It’s very important that the lump crabmeat is very well picked over for any cartilage. Add to a bowl. In a small sauté pan use 1 tablespoon of butter and sauté the onion and pepper until very soft. Add to the crabmeat. Add the remaining ingredients except butter into the bowl. Form 8 crabcakes patties. Place on a tray and cover with plastic wrap. Keep in the fridge for an hour. Using a large skillet, melt butter and sauté  cakes until golden brown. Place on a bed of the red pepper and sweet corn sauté, add a little cilantro mayonnaise to the top of each cake and a few cilantro leaves. Serve remaining cilantro mayonnaise to the side.

Cilantro Mayonnaise

2 tablespoons olive oil

1 clove garlic minced

2 tablespoons water

6 oz cilantro leaves

1 cup store bought mayonnaise

Juice of 2 limes

Zest of 1 lime

5 drops Tabasco

Directions

In a food processor combine olive oil, garlic and water. Add cilantro and puree. Add mayonnaise, Tabasco lime juice and zest and blend again. Remove and place in glass jar cover and refrigerate until ready to serve with crabcakes.

Onions Celeste

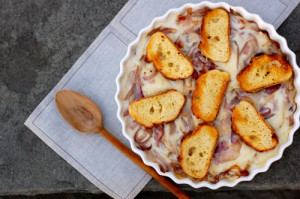
Onions Celeste was a dish my mother made when I was growing up. It was a family favorite for years and then we eventually moved on. I’m not sure where the original recipe came from my mother was given this recipe from one of her friends. The original recipe called for canned cream of chicken soup. Not too long ago, I took out this recipe to surprise my mother but updated it and it is now once again a family holiday favorite. It satisfies my desire for creamed onions but with much less work. Mom was thrilled to enjoy an old favorite ! It’s a perfect side dish for holiday entertaining. Give this yummy retro classic a try!
From by the bay, wishing you celestial food memories!

Maryann


blog onion celeste

Onions Celeste
Serves 6

4 oz chopped pancetta
2 tablespoons unsalted butter

2 large red onions, sliced thinly

8 oz grated gruyere cheese

1 recipe béchamel sauce ( approximately 1 ½ cups)

8 slices buttered toasted French bread

Directions

In a large heavy skillet over medium heat cook the pancetta until crispy. Remove from pan with slotted spoon and drain on paper towels. In the same pan heat the butter and sauté onion until soft and starts to caramelize which would be about 20 to 30 minutes. Spoon the onions into a butter baking dish 8” by 8” along with the pancetta. Pour the béchamel sauce over the onions , add the cheese and stir. Top with the buttered toast and bake in a 350F oven for approximately 25 minutes. You can also prepare this recipe up to a day in advance and refrigerate without the buttered toast. Bring to room temperature and top with toast and place into the oven.

Bechamel Sauce

Makes 1 ½ cups

3 tablespoons unsalted butter

2 tablespoons flour

2 cups whole milk

1 teaspoon salt

¼ teaspoon grated nutmeg

Directions

In a medium sauce pan add the milk and heat until it is about to boil. While the milk is heating, in another sauce pan , heat the butter until melted. Add the flour and mix until smooth. Cook the mixture for about 5-6 minutes until it becomes a golden color. Slowly add the hot milk to the flour mixture whisking continuously. Bring to a boil and then cook for another 10 -15 minutes continuing to whisk until the sauce begins to thicken. Remove from heat and add the salt and nutmeg.


Twice As Naughty Baked Potato

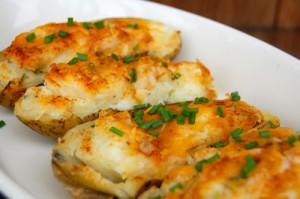
a baked pot

Christmas is a time for traditions and celebratory meals ! Growing up that meant this favorite side dish, twice baked potatoes. My mom always made these for our Christmas meal – we would only them once a year, which makes the dish twice as special . We would eagerly anticipate having this special potato dish , which gets it name from baking the potatoes twice. First, you bake the full potato , next it’s cut in half and you scoop out the flesh of the potato , add lots of lovely ( naughty ingredients such as butter, mayonnaise and cheddar cheese and then bake the potatoes a second time. You will love the richness and texture of these twice baked potatoes. Start your own tradition this Christmas making this luxurious side dish!
From by the bay, wishing you naughty food memories!
Maryann

Twice Baked Potato

Serves 6-8

6 russet potatoes

1 tablespoon olive oil

3 tablespoons unsalted butter

3 tablespoons mayonnaise

½ cup whole milk

½ cup scallions, chopped

2 cups grated sharp cheddar cheese

1 teaspoon salt

½ teaspoon black pepper

1 teaspoon paprika

3 tablespoons chives, chopped

Directions

Preheat over to 350F. Sprinkle potatoes with olive oil and spread to coat the potato. Wrap each potato in aluminum foil and bake in the oven for 1 to 1 ½ hour until potatoes are tender. Remove from oven and let cool until you can touch. Cut each potato in half with a serrated knife and scoop out the potato from each half into a bowl , leaving the outside skin in tack. To the bowl with the potatoes add butter, mayonnaise, milk, and beat with an electric mixer until fluffy. Fold in the scallions, salt and pepper. Fill each potato skin with the potato mixture. Place onto a baking sheet and top the stuffed potatoes with grated cheese and paprika. Bake in a 350f oven for 15-20 minutes and until heated through and cheese is melted. Remove from oven, sprinkle with chives and serve warm.


Chocolate, Cherry and Almond Biscotti

a CHOCO BISCOTTI

With Thanksgiving over, the shift to Christmas happens immediately! We all know that it also mean’s that Santa Claus is coming to town! Santa loves himself some cookies and this one is a perfect match – big on taste and flavor. These chocolate biscotti cookies are made with almonds and dried cherries and then dipped in dark chocolate to make a delicious cookie perfect for dipping into your coffee or hot chocolate. So get your cookie trays ready because remember the the big fat man is coming……….real soon !

From by the bay, waiting to make food memories for the big fat man!
Maryann

Chocolate, Cherry and Almond Biscotti

24 cookies

1 cup dried cherries

½ cup almond slivers

½ cup unsalted butter

1 tablespoon shortening (Crisco)

3 eggs

1 cup fine sugar

2 teaspoon vanilla

3 cups all purpose flour

½ cup cocoa powder

1 teaspoon baking powder

½ teaspoon salt

6 oz good quality bittersweet dark chocolate

Directions

Preheat oven to 350F. In a bowl add dry ingredients, flour, cocoa powder, baking powder and salt. Mix and keep to the side. Using an electric mixer, beat together butter and shortening until fluffy. Add sugar and beat well. Add eggs one at a time until well combined. Add vanilla until blended. Add dry ingredients: flour, cocoa powder, baking powder and salt. Mix well until the dough is smooth. Using a spoon and  mix in the dried cherries and almonds. Transfer the dough to a lightly floured surface and divide into two. Shape each half of the dough into a log approximately 2 inch high x 12 inches long.  Place the logs on to an ungreased baking sheet. Bake for 30 minutes until golden brown. Remove from oven and let cool for 10 minutes on a baking rack. Place on a cutting board and using a serrated knife slice each log on the diagonal into 12 pieces approximately 1 inch thick. Place the pieces back on to the baking sheet and bake 8-10  minutes, turn the slices to the other side and bake another 8-10  minutes. Remove from oven and cool on a wire rack. Fill medium pot 1/3 with water and simmer. Add to the top of the pot a glass bowl that sits on the top of the pot to create a bain du marie. Add the chocolate and melt over the simmering water. Don’t let the water touch the glass bowl. Once the chocolate is melted use an offset spatula to cover the end of each cookie. Place chocolate on approximately 1/3 of the cookie on all sides. Allow to set at room temperature on a wire rack . You may also set in the refrigerator for a ½ hour to hasten the process.  Store cookies in an air tight container.


Mango and Honey Glazed Spareribs

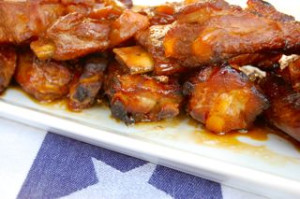
Living and working in Manhattan is one of the best experiences in the world. There are however, tradeoffs around the contraints of apartment living. For someone like me,who has a passion for cooking, a small city kitchen requires alot of creativity and organziation. Entertaining in small spaces can be challenging. So when I bought my house by the bay, among the many wonders this house had to offer such as sweeping views of the water, open spaces, a great kitchen, there was one feature that I had no idea how much I would love.  Wait for it …….a walk in pantry. I love my pantry! Just keeping it stocked with interesting food items is fun. My souvenirs from traveling are now often food to place onto my pantry shelf in anticipation of creating some new dish. When I start thinking about a recipe I walk into the pantry and rummage through the shelves looking for ingredients to inspire me. The recipe below for Mango and Honey Glazed Spareribs is one such recipe. I always have some of Major Grey’s Mango Chutney on my pantry shelf.
Major Grey’s chutney is a combination of mango, lime juice, raisins, tamarind, onion and spices.  My dad loved this chutney and it’s exotic taste. I pulled the chutney off the shelf because it was getting close to the expiration date ( this is a whole other aspect of pantry living, managing to expiration dates ).  I used the chutney as the base to my glaze and the results were amazing.

From by the bay wishing you lovely chutney food memories!
Maryann

blog spare ribs


Mango and Honey Glazed Spareribs

Serves 4 as main course or 8 as appetizer

2 ½ lbs. racks baby back ribs

2 cloves garlic, minced

1 tablespoon fresh ginger , grated

½ teaspoon cayenne pepper

3 tablespoons dark brown sugar

¼ cup honey

¼ cup vermouth

½ cup soy sauce

6 ounces mango chutney

Directions

Combine all ingredients into a plastic sealed bag. Place in refrigerator for at least 6 hours or better overnight. Preheat oven to 400 degrees F. Line a large baking dish with aluminum foil and empty the entire contents of the plastic bag into the dish. Arrange ribs in pan in one layer. Place in oven and turn every 15 minutes as the ribs brown. Bake for approximately 45 minutes. Tranfer ribs to cutting board and let stand 5 minutes before cutting.

Sometimes I use country style ribs for this dish, in which case the cooking time is a little longer 1 hour. The meat literally falls off the bones – it delivers great favor and is more economic.

Tip: keep handy in the refrigerator tubes of garlic and ginger paste. They are available in Japanese specialty food stores. They are perfect for making quick marinades – without compromising the taste.


Brisket with Cola Barbecue Sauce

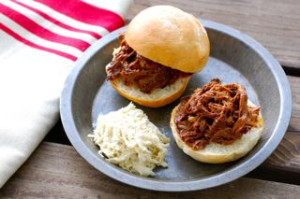
I have been intrigued with cooking with cola and other soft drinks ever since I first read about it – which was in the Nigella Lawson’s book “Nigella Bites”. Leave it to me to learn about Southern cooking  from a British food writer.  I started to experiment with barbecue sauce and the result is this jazzed up version for brisket. It’s a great way to entertain a crowd with big flavor and little work. The sweetness of the cola permeates the brisket which is then perfectly balanced with the acid coming from both the Balsamic vinegar and Worcestershire sauce. You will find yourself making dish over and over again. Yes, it’s that good!

From by the bay wishing you sweet cola food memories! Maryann

blog cola brisket

Brisket with Cola Barbecue Sauce

Serves 6

3 pounds brisket

3 cups cola barbecue sauce

Directions

Place brisket overnight in a sealed plastic bag along with the barbecue sauce. Next day, preheat oven to 275F. Empty the contents of the plastic bag into a Dutch oven include all the sauce. Cover with lid and place in the oven for approximately 4 hours. Brisket takes approximately 1 hours and 15 minutes per lb to cook. Remove from oven. Using two forks pull the meat apart and shred into the remaining sauce. Combine and serve. This can also be served as a sandwich using either fresh rolls  and coleslaw or as a soft taco along with some sour cream. 


Cola Barbecue Sauce

Makes 3 cups

12ozs. Cola

1 ½ cup ketchup

4 garlic cloves, smashed

5 bay leaves

¼ cup balsamic vinegar

¼ cup Worcestershire Sauce

1 teaspoon smoked paprika

1 teaspoon fine sea salt

¼ teaspoon chili flakes

5 bay leaves

1 tablespoon fennel seeds

2 tablespoons fresh thyme, chopped

2 tablespoons fresh rosemary, chopped

Directions

In a medium saucepan bring all ingredients to a boil, then reduce heat and simmer for 30 to 45 minutes , sauce will thicken . Cool and use with steak, chicken or pork.

Note: no diet cola for this – the sugar is essential to the taste of the barbecue sauce.