Category Archives: Bread

Bananas for this Banana Dessert!

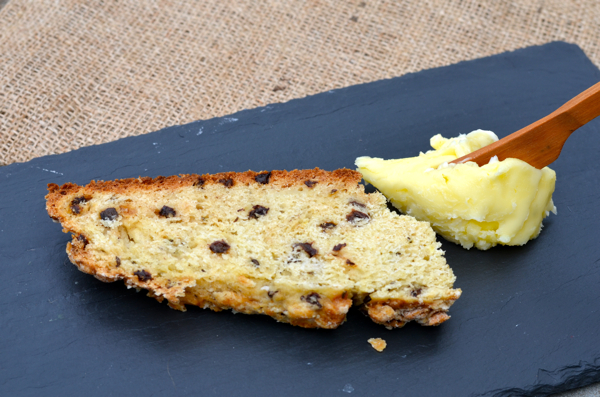
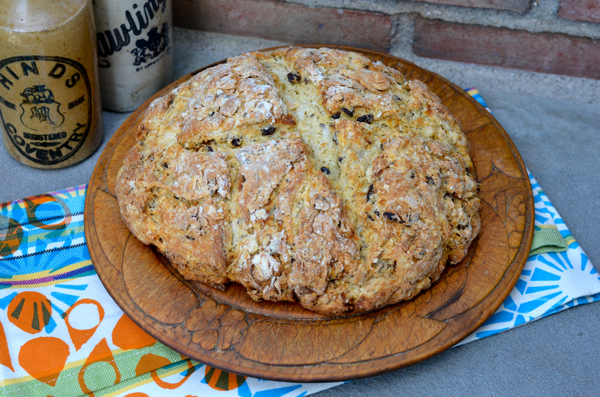
It’s almost Valentine’s Day and I’m sure you have seem every chocolate recipe imaginable! But what do you do if your favorite loved one doesn’t like chocolate! I say go bananas with this double dose of banana cookery from two of my favorite chefs! I decided to double my banana game for dessert one evening by making Dominique Ansel’s banana bread. This is the perfect recipe! It is rich, delicious, moist  and easy. Seriously this recipe is perfection. The bread stays moist for days if wrapped well. Next up is the banana jam, just imagine a caramel and a banana joined together and that is what this jam is ! It’s great on toast, biscuits and yes this banana bread. If you want to kick the whole thing up an notch serve a slice of banana bread topped with a scoop of vanilla or caramel ice cream and then drizzle the top with banana jam!  It’s heaven! Each recipe stands perfectly on its own but in honor of Valentine’s Day it’s about the union . This is a union you will want to experience.

From by the bay wishing you, top banana food memories!

Maryann

Dominique Ansel’s Banana Bread

As featured on Tasting Table courtesy of Dominique Ansel

Preparation Time 1 hour and 30 minutes

Ingredients

  • 2 cups sugar
  • 2 cups flour
  • ¾ teaspoon baking soda
  • ¾ teaspoon nutmeg
  • 1 teaspoon salt
  • 1 teaspoon baking powder
  • 3 eggs
  • 4 overripe bananas, mashed
  • 14 tablespoons unsalted butter, melted, plus more for greasing pan

Directions

Preheat the oven to 350°. Grease a 10″ x 5″ x 3 ½” loaf pan and set aside. In a large bowl, combine the sugar, flour, baking soda, nutmeg, salt and baking powder. In a separate bowl, beat the eggs and combine with the mashed bananas. Pour the wet ingredients over the dry ingredients and mix together until just combined. Stir in the melted butter until fully incorporated. Pour the batter into prepared pan and bake until golden brown and a cake tester inserted in the center of the loaf comes out clean, about 1 hour and 10 minutes. Allow to cool for 20 minutes before slicing.

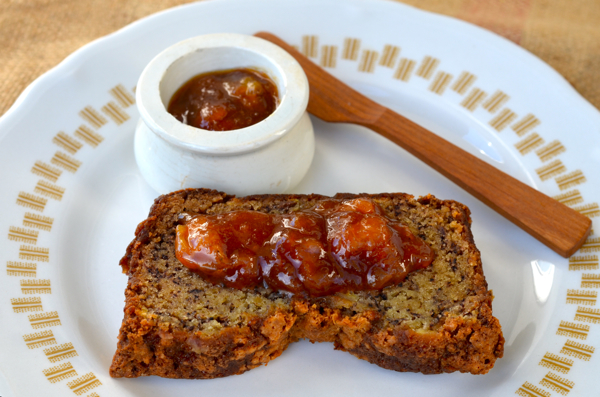
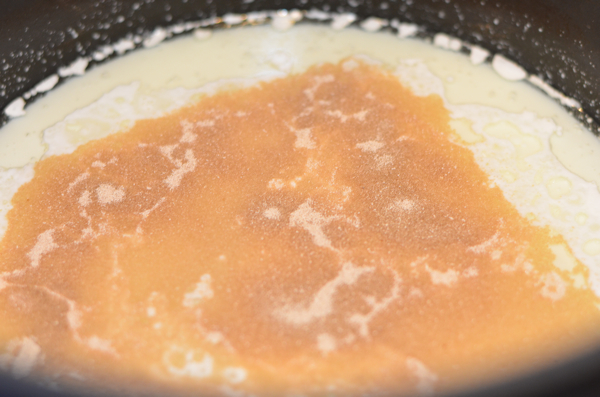
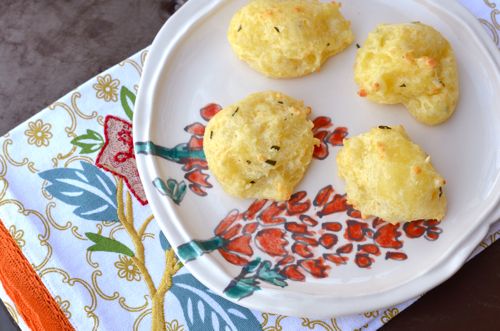
Biscuit Love Banana Jam

Yields 4 cups    Preparation Time 40 minutes

As featured on the Food Network Courtesy of Karl Worley of Biscuit Love Nashville


Directions

Mix the sugar and 1/4 cup water in a heavy-bottomed large saucepan. Heat the sugar mixture on high heat until the mixture caramelizes; the water will need to evaporate before the sugar will caramelize. Once the caramel reaches a deep brown color, turn the heat to low and carefully add the bananas. Stir with a wooden or heat-resistant spoon until the bananas begin to break down, 10 to 15 minutes. Add the salt and remove from the heat. Stir in the lime juice and vanilla.

Serve with warm biscuits. The jam will keep in the refrigerator for up to 1 month.


Normandy Cider Rye Bread

I discovered a wonderful book that is literally a master class on the baking of rye breads. The book is called The Rye Baker by Stanley Ginsberg. Mr. Ginsberg offers not only techniques but a history of the grains along with over 70 classic recipes from all over the world. This bread journey  includes the chemistry of sours, soakers, sponges and scalds. If you are a baker and a bread lover you will want this book in home library. If you think you can’t make bread , I beg to differ. The recipe below was developed by Mr. Ginsberg for The Splendid Table and it’s incredibly easy to make with delicious results. There is very little active time in the preparation and the results are amazing. The aroma of fresh bread will delight you and then taking a slice of your homemade bread will be sheer heaven. I find if you wrap the bread well it will keep well for the next day and after that it’s the perfect slice of toast.

From by the bay wishing you delightful rye bread food memories!

Maryann

Note: I found better results with the bread rising by mixing first into a bowl the yeast, sugar and cider for approximately 15 minutes and then adding the remaining ingredients. Also, depending on the temperature of your kitchen you may need additional time for the dough to rise.

Normandy Cider Rye Bread

Makes Two Loaves

Recipe by Stanley Ginsburg author of The Rye Baker, Classic breads from Europe and America, as featured for The Splendid Table.

Ingredients

3 1/2 cups medium rye flour
1 1/2 cups all-purpose flour
2 cups hard cider, at room temperature
2 tsp salt
1 pkg (1/4 oz) instant yeast
2 1/2 tsp sugar

Directions

1. Combine all the ingredients in a mixer and use the dough hook to mix on low until the dough is evenly blended, 6-8 minutes. If mixing by hand, 10-12 minutes.

2. Cover the bowl and let the dough rise at room temperature until doubled in volume, about 1 hour.

3. Turn the dough onto a floured work surface, divide in two and shape each piece into a flattened ball. Place the loaves on a parchment lined sheet-pan, cover and let rise at room temperature until the surface shows cracks, about 1 hour.

4. Preheat the oven to 400°F, use a sharp knife to slash the loaves and bake until it thumps when tapped with a finger, 45-50 minutes. Transfer to a rack and cool thoroughly before slicing.

Hot Cross Buns

blog hot cross buns 1

Thinking about the week ahead, I decided to research making hot cross buns. This recipe by Ree Drummond (The Pioneer Woman), was the one I decided I liked the best. I never much cared for the hot cross buns in the bakeries, much of that dislike was around the bun being too sweet and some bakeries would use dried fruit I didn’t like and occasionally it was candied. It definitely put me off hot cross buns, This recipes has an easy technique for making a yeast dough, a nice amount of spices and Ree suggested dried fruit like raisins and cranberries. The resulting bun is terrific and really changes not only my point of view about these Easter treat, but my whole family!

The traditions around hot cross buns are wonderful. In the United States, hot cross buns are part of the tradition for both Good Friday and Easter, while in Great Britain they are primarily  Good Friday tradition. Some myths about hot cross buns are if you hang one in your kitchen evil spirits will stay away, if on good Friday you make them sharing them will cement your friendships, the bun can keep ships from sinking and a bun made on Good Friday will never get moldy. That’s a lot from a small little mount of dough!

From by the bay, wishing you little bun food memories!

Maryann

blog hot cross bun 2

Hot Cross Buns

Recipe by Ree Drummond, Pioneeer Woman April 1, 2010

Buns
2 cups Whole Milk
1/2 cup Canola Oil
1/2 cup Sugar
1 package (2 1/4 Teaspoons) Active Dry Yeast
4 cups All-purpose Flour
1/2 cup (additional) Flour
1/2 teaspoon (heaping) Baking Powder
1/2 teaspoon (scant) Baking Soda
2 teaspoons Salt
1/4 cup Sugar
1 teaspoon Cinnamon
Spices: Cardamom, Nutmeg, Allspice (optional)
1/2 cup Raisins
GLAZE
1 whole Egg White
Splash Of Milk
Icing
1 whole Egg White
Powdered Sugar
Splash Of Milk

blog hot cross bun 3
INSTRUCTIONS
BUNS

Combine 2 cups milk, canola oil, and 1/2 cup sugar in a saucepan. Stir and heat until very warm but not boiling. Turn off the heat and allow to cool until mixture is still warm, but not hot–about 30 minutes.

Sprinkle yeast over mixture. Add 4 cups of flour and stir to combine. Mixture will be very sticky. Cover with a towel and set aside for 1 hour.

Add 1/2 cup flour, baking powder, baking soda, and salt. Stir till combined.

Combine 1/4 cup sugar with cinnamon and whatever other spices you want to use.

Lightly flour surface. Press to slightly flatten dough. Sprinkle a couple tablespoons of the sugar/cinnamon mixture. Sprinkle on about a third of the raisins. Then fold the dough over on itself and flatten again so the dough is “plain” again. Repeat the sugar/raisin process, then fold the dough again. Repeat a third time until all the raisins are used. (You won’t use all the sugar/cinnamon mixture.)

Pinch off ping pong or golf ball-size bunches of dough. With floured hands, quickly roll it into a ball, then turn the edges under themselves slightly. Place on a lightly greased cookie sheet. Cover and allow to rise in a warm place for at least 30 minutes…an hour-plus is better.

blog hot cross bun 5

PREHEAT OVEN TO 400 degrees

GLAZE

Mix 1 egg white with a splash of milk. Brush onto each roll.

Bake for 20 minutes, give or take, or until tops of buns have turned nice and golden brown.

Remove from pan and allow to cool on a cooling rack.

ICING

Mix 1 egg white with enough powdered sugar for icing to be very thick. Splash in milk as needed for consistency.

Add icing to a small Ziploc bag and snip the corner. Make icing crosses on each roll, making sure they’re completely cooled first.

hot cross bun 6

Luck of the Irish Soda Bread

blog irish soda

Although I’m not Irish, I have always enjoyed eating Irish Soda Bread.  St. Patrick’s Day is the unofficial start of Spring. After a long winter, you start to see the signs of spring. The crocus start peeking out of the ground, there is a big outdoor parade with lots of green the official color of spring and then there is Irish Soda Bread. I had some Irish good luck when my mother’s close friend Nancy, shared her family recipe with me. I find this bread pretty easy to make and quite forgiving in the preparation. Ready to celebrate Spring with some of your own good luck?

From by the bay wishing you some good luck food memories of your own!

Maryann

blog irish soda bread

Irish Soda Bread

Ingredients
3 1/2 cups flour, plus a tablespoon to mix with currants

1/4 cup granulated sugar

1 teaspoon baking soda

1 teaspoon baking powder

3/4 teaspoon salt

1/2 cup unsalted butter

1 1/2 cups buttermilk

1 cup currants

1 tablespoon caraway seeds, optional

Directions
Preheat the oven to 350 degrees F. Line a sheet pan with parchment paper.

Combine the flour, sugar, baking soda, baking powder, caraway seeds and salt in the bowl of an electric mixer fitted with the paddle attachment. Add the butter and mix on low speed until the butter is mixed into the flour.

With a fork, lightly beat the buttermilk and egg together in a measuring cup. With the mixer on low speed, slowly add the buttermilk mixture to the flour mixture. Combine the currants with 1 tablespoon of flour and mix into the dough. It will be very wet.

Dump the dough onto a well-floured board and knead it a few times into a round loaf. Place the loaf on the prepared sheet pan and lightly cut an X into the top of the bread with a serrated knife. Bake for 45 to 55 minutes, or until a cake tester comes out clean. When you tap the loaf, it will have a hollow sound. Cool on a baking rack. Serve warm or at room temperature.

 blog shamrock

Homemade Pita Bread

It’s summer and one of the perfect canvases for a summer meal is the reliable pita bread! Let’s all remember my mother is Greek!! Last weekend, I decided to tackle homemade pita bread, thinking it was a big chore and difficult to do, much to my surprise it was super easy. I know you’re thinking really how is this easy? It’s 5 steps –  measure, mix, rise, pull and grill. If you are like me , how many times have you watched Bobby Flay make flatbread or pizza or pita on the grill and wonder how is this not a mess. I’m here to tell you , Bobby speaks the truth when he says it’s easy. The key is to put  the dough on the grill and let it bake a a minute or two.  The dough pulls away naturally once it’s baked.  The taste of home made pita is so superior to store brought you will want to give this a try!  I’ll have a few recipes coming up that is the perfect complement to homemade pita! Yum!!

From by the bay, wishing you perfect pita food memories!

Maryann

blog pita


Home made Pita Bread

Adapted from mygreekdish.com as posted by


Ingredients

  • 17 1/2 ounces  all-purpose flour
  • 1 teaspoon dry yeast
  • 1 tsp salt
  • 1 tsp sugar
  • 1 1/2 glass of lukewarm water (40C)


Instructions

  1. To prepare this pitta bread recipe start by sieving the flour into your mixer’s bowl. Add the yeast, sugar and salt and blend with a spoon.
  2. Add a little bit of water and start mixing, using the dough hook. Pour in the water a little bit at a time, at a steady stream, whilst mixing. Wait each time for the water to be absorbed and continue adding some more.
  3. Depending on the flour, the dough may or may need a little bit less water than this pita bread recipe calls for. After mixing for a while, the dough for your pita bread should become an elastic ball. If the dough is still crumbled, you should add some more water. If it becomes too sticky, this means that you added more water than needed. In that case, add 1 tsp of flour and continue mixing.
  4. When done, cover the dough with plastic wrap and let it sit in a warm place, for at least 1 hour, until it doubles its size. This is an important step for this pita bread recipe, so that the pita bread becomes fluffy and soft.
  5. Take the dough out of the bowl and knead a little bit with your hands. Split in 6 evenly sized portions.
  6. To form the pita bread, you can either use a rolling pin, or stretch it with your hands for a more rustic look (and my preference actually ), about 1/4 inch thick.
  7. Heat an outdoor grill.  Put the stretched dough on the grill and close the cover. Let bake a minute or two and flip the bread. Grill another minute and remove. If you don’t want to use the grill – heat a non-sticking frying pan to medium-high heat (with no grease) and fry each pita bread for about 3-4 minutes on each side, until slightly colored and still soft. To give more color, push the pita bread with a wooden spoon on the pan. Remove the serve.
 

Caramelized Onion and Fennel Focaccia

A onion fennel focaccia 012

Caramelized Onion and Fennel Focaccia


Dough:

  • 1 tablespoon fine sugar
  • 1 ½ cups very hot water
  • 1 package yeast
  • 3 cups flour plus flour for kneading ( ½- 1 cup)
  • Spray cooking oil


Topping:

  • 2 tablespoons unsalted butter
  • 1 large Vidalia onion thinly sliced
  • 1 cup fennel thinly sliced
  • ½ teaspoon fine sea salt
  • ¼ teaspoon ground black pepper
  • ½ teaspoon fennel seed
  • ½ cup grated gruyere cheese
  •  ½ teaspoon Grey sea salt to top bread


Directions to make dough:


In a bowl dissolve sugar in 1 ½ cup hot water, then add the yeast cover with a towel and set aside for 10 minutes. The mixture should start to foam. Add 3 cups of flour mix and turn dough onto floured surface. Put some flour on top of the dough and on your hands and knead for about 5 minutes. As you work the dough add enough flour to make the dough less tacky. After kneading, spray a bowl with cooking oil. Place dough into bowl. Spray the top of dough with more cooking oil spray. Cover the bowl with a moist dishtowel and place to the side to rise for 1 1/2hr. The dough should be double in size. Punch the dough down. Take a non stick rimmed cooking sheet 9” x 13”, spray lightly with cooking oil and spread dough out to the size of the pan. Cover with damp dishtowel and let rise again for 30 minutes.


Directions to make topping:


Take a sauté pan to medium flame add butter. To melted butter add the sliced onions and fennel, ½ tsp salt and ¼ tsp pepper and cook until brown and caramelized stirring frequently not to burn, approximately 15 minutes. Add the fennel seed and let cool.


Directions to bake bread:


Preheat over to 425F , take the cooking sheet with dough and using finger tips press into the dough making dimples. Spread the onion fennel mixture over the top leaving 1 inch not covered around the perimeter of the pan. Next added the grated cheese and the grey sea salt. Place in oven and bake for 25 minutes until golden brown. Serve warm or room temperature.

Basil Zucchini Corn Bread

blog zuc bread
I can get so caught up shopping at the farm stand this time of year. This past weekend I did just that and found myself staring at a few too many zucchini on my kitchen counter.  As a result I grated the zucchini and added to my favorite cornbread recipe with some fresh basil and result was a moist and fresh tasting bread. Which tastes great the next day if you have any leftover.
This bread  is a big hit here by the bay!
From by the bay wishing you yummy zucchini food memories!
Maryann
blog zuc bread 2

Basil Zucchini Corn Bread 

Serves 8


Ingredients

1 cup all purpose flour

1 tablespoon baking powder

1/2 teaspoon fine sea salt

3/4 cup yellow cornmeal

3 tablespoons granulated sugar

3/4 cup buttermilk

1 egg beaten

6 tablespoons unsalted butter, melted

1 zucchini

8 fresh basil leaves


Directions

Preheat oven to 350 degrees F. Butter  1 medium loaf pan. Fill a small bowl with ice water. Bring a small pan of water to a boil, add the basil leaves into boiling water for 15 seconds. Remove leaves and plunge into the ice water to stop the cooking. Remove leaves from ice water, dry and chop. Set aside.  Take the zucchini, cut off each end. Cut three rounds 1/8 inch thick from one end of zucchini and set aside. Grate the zucchini coarsely, using a box grater, until you have 1 cup of grated zucchini. In a large bowl combine well the dry ingredients: flour, salt, cornmeal, sugar and baking powder. In a separate medium bowl combine and beat buttermilk, eggs and butter. Fold into this the chopped basil and grated zucchini. Pour wet ingredients into the bowl with the dry ingredients and stir well.  Pour the batter into the loaf pan. Top batter with the 3 zucchini rounds. Place pan onto baking sheet and bake for about 55 minutes until the tester comes out clean. Cool on metal rack for 10 minutes. When cool remove bread from pan. Serve warm or room temperature.

Olive Flatbread

I discovered this easy no knead flatbread recipe while on the King Arthur Flour website. It’s a perfect summer bread recipe since it requires no kneading –  it’s simple, easy and tasty. So when my sister Diane phoned one Saturday afternoon saying she was stopping by, I didn’t have to go much further than my pantry and herb garden to come up with a delicious and playful topping for my flatbread. I mixed two types of olives, slicing them into little rounds to create the base of my topping. To that I added some fresh mixed chopped herbs from my garden, using my favorites rosemary and thyme and along with that some anchovy paste for some saltiness and depth of flavor. I keep a tube of anchovy paste in the fridge to use when I want to add an unexpected flavor to a dish, it’s especially great for salad dressings. The end result was a savory and beautiful flatbread that looked as if it was covered with a confetti of olives! The bread is perfect as a little snack or the centerpiece for a cocktail party surrounded with a cheese or two. It was just the right thing for our afternoon visit.
From by the bay wishing you some playful food memories!
Maryann

blog olives

Olive Flatbread

Ingredients
1 recipe flatbread dough ( recipe follows)
1/2 cup green olives, sliced in rounds
1/2 cup black olives, sliced in rounds
1 tablespoon minced fresh rosemary
1 tablespoon minced fresh thyme leaves
2 teaspoons anchovy paste
1 tablespoon olive oil, plus olive for pan
1 teaspoon coarse sea salt
Directions
Preheat oven to 375 degrees F.  Grease a 9″x 13″ with olive oil. Take the flatbread dough and spread out on the pan, it should cover about 2/3 of the pan. Cover with plastic wrap and let rise for an hour. While the dough is rising place all the ingredients into bowl, except the sea salt and mix. Once the dough has risen place the topping over the dough. Press topping gently into the dough and then sprinkle with sea salt. Place in the oven and bake for 35 to 40 minutes. Remove from oven and serve warm or at room temperature.
No Knead Flatbread 
Adapted from King Arthur’s Flour 
Ingredients
3/4 cup lukewarm water
1 tablespoon olive oil
3/4 teaspoon fine sea salt
1 3/4 cups all purpose flour
1/2 tablespoon instant yeast
Directions
Place all ingredients into the bowl of an electric mixer. At a low speed first combine the ingredients, slowly increase the speed to high and mix for about 1 minute. Grease a 9″x 13″ with olive oil. Take the flatbread dough and spread out on to the pan, it should cover about 2/3 of the pan. Cover with plastic wrap and let rise for an hour. Place in the oven and bake for 35 to 40 minutes. Remove from oven and serve warm or at room temperature.
http://www.kingarthurflour.com/recipes/no-knead-garlic-cheese-flatbread-recipe

blog olive bread

Brazilian Cheese Puffs

Last month , I was headed into another early morning meeting at work. I had the good fortune to be meeting with someone who is very thoughtful. That morning , she welcomed me with a delightful treat, two delicious brazilian cheese puffs. This was my first time tasting this yummy, light and airy bread. They are crispy on the outside and soft and cheesy on the inside. When I arrived home by the bay that weekend, my sister Nancy welcomed me with the same little treat. Amazing to spend your whole life unaware of something so good and then you experience it twice in one week . I knew then, i needed to figure out to make these little breads myself. So this is the recipe and technique that worked best for me. It’s a hybrid of  several recipes I tried. You can make these in a large size and serve for breakfast ( do adjust the baking time if you do that) or make them in a small bite size as an appetizer to serve along with your favorite wine or cocktail. These are pretty easy to make and definitely worth the time and effort. 

From by the bay, wishing you cheesy food memories!

Maryann

blog cheese puff 1

Brazilian Cheese Puffs
Ingredients

2 cups tapioca flour*
1 cup milk
1/2 cup unsalted butter, 1 stick
1 teaspoon fine sea salt
1 1/2 cups grated Parmesan cheese
2 eggs
* Tapioca Flour can be found at specialty markets such as Whole Foods or Asian markets and is also called manioc starch or tapioca starch.
1 tablespoon fresh rosemary, minced

Directions


 Preheat oven to 450 degrees F. Line two baking sheets with parchment paper. In a medium sauce pan, bring the milk, salt, and butter to a boil, stirring occasionally. Once  the mixture starts to boil remove from heat. Slowly add tapioca flour, stirring constantly until thoroughly mixed.  The dough will be somewhat gummy at this point. Transfer the dough to a standing mixer fitted with a paddle attachement. Beat the dough for a few minutes until it smooths out.  Whisk the eggs in a small bowl and add into the dough 1/2 at a time . Make sure the egg is incorporated into the dough before adding the rest of the egg. With the mixer on medium, beat in the cheese and rosemary until incorporated. Round out the dough onto the parchment lined baking sheet into little mounds spaced apart about 2 inches. Approximately 10 per tray. Place in the oven and immediately turn down the heat to 350 degrees F. Bake for 25 to 30 minutes. They will puff, look dry on the outside and start to turn color. Cool slightly and eat warm.Cooked puffs can be stored, in the fridge as long as it’s kept covered and then reheat in the microwave.
note: I like to mixed my parmesan cheese 1/2 grated and 1/2 shredded for a little more texture. You can also use thyme in place of rosemary or add some mixed garlic in place of the herbs. If you like things spicy, substitute the parmesan cheese for cheddar and replace the rosemary with minced fresh jalapeno.
blog cheese puffs 2


Holiday Start : Cranberry Soda Bread with Cranberry Jam

blog cranberry soda bread
This is the perfect Christmas breakfast. Let me specify that I do not use the word perfect lightly!!!! This breakfast is inspired by two of my favorite cooks, Nigella Lawson and Ina Garten, so how perfect is that! Last Christmas as I settled in with some cookbooks on a snowy night, I reread one of my favorite books from Nigella Lawson, “Feast – Food To Celebrate”. Tucked away in the book was a recipe within a recipe for cranberry jam and I just had to make it! Now, I always had a fear of making jam of any kind. My first reason was a fear of using pectin My second reason was another fear, the fear of canning. I would worry that I wouldn’t seal the jars properly. Nigella’s cranberry jam is so easy that my fears just faded away and the results were delicious! Cranberries are filled naturally with pectin, so making this jam is almost as easy as boiling water. I decided to just refrigerate the jam the way I do cranberry sauce and that decision saved the whole stress about sealing the jars properly. I made this jam last Christmas morning and it disappeared as quickly as Santa did up the chimney. I did have the perfect accompaniment to the jam that morning Irish Soda Bread without the raisins. I use Ina Garten’s recipe because , why fool around with perfection. The only change I made is one that I always do , I switch the raisins to dried cranberries. This switch is a result of the fact that my sister Nancy hates raisins and she loves dried cranberries. I have to tell you that once I switched, there was no going back. You need to try this bread. Nothing beats the combination of warm cranberry soda bread topped with cranberry jam. It screams Christmas, holidays and that something really special is going on. Enjoy – tis’ the season!
From by the bay, wishing you very cranberry food memories!
Maryann

Cranberry Soda Bread
Adapted from Ina Garten’s Irish Soda Bread from “Barefoot Contessa At Home” published in 2006.

Ingredients
4 cups all-purpose flour, plus extra for currants
4 tablespoons sugar
1 teaspoon baking soda
1 1/2 teaspoons kosher salt
4 tablespoons (1/2 stick) cold unsalted butter, cut into 1/2-inch dice
1 3/4 cups cold buttermilk, shaken
1 extra-large egg, lightly beaten
1 teaspoon grated orange zest
1 cup dried cranberries

Directions
Preheat the oven to 375 degrees F. Line a sheet pan with parchment paper.

Combine the flour, sugar, baking soda, and salt in the bowl of an electric mixer fitted with the paddle attachment. Add the butter and mix on low speed until the butter is mixed into the flour.

With a fork, lightly beat the buttermilk, egg, and orange zest together in a measuring cup. With the mixer on low speed, slowly add the buttermilk mixture to the flour mixture. Combine the currants with 1 tablespoon of flour and mix into the dough. It will be very wet.

Dump the dough onto a well-floured board and knead it a few times into a round loaf. Place the loaf on the prepared sheet pan and lightly cut an X into the top of the bread with a serrated knife. Bake for 45 to 55 minutes, or until a cake tester comes out clean. When you tap the loaf, it will have a hollow sound.

Cool on a baking rack. Serve warm or at room temperature.


Cranberry Jam

Adapted from Nigella Lawson’s Cranberry Jam  from “Feast Food To Celebrate Life ” published in 2004

Ingredients 
12 ounces fresh cranberries 
1 3/4 cups granulated sugar

Directions
Put a film of water in the bottom of a large saucepan and add the cranberries and sugar. Stir patiently over a low heat to dissolve the sugar; this will take a little while. Turn up the heat and boil the pan rapidly until setting point is reached, about 7 minutes. (Alternatively it will have reached a jam-like consistency.)
Pour the jam into a sterilized jar (s) and seal immediately or keep in the refrigerator for 1 week. 
Makes approximately 4 cups.