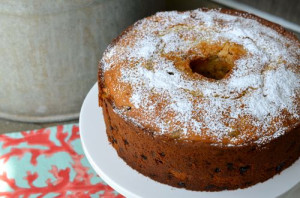
Raisin Pound Cake

blog raisin cake
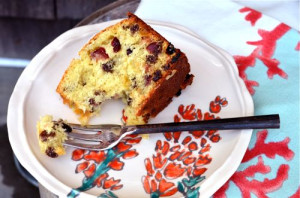
As I was thinking about what to write for my Mother’s Day blog, I decided to look through my Grandmother’s recipes. I love looking at the tattered, fragile pieces of paper, remembering the recipe, the family gathered for some occasion or just an ordinary day made special with the love that comes along with the food. The recipes are all hand written, many of them just a list of ingredients mostly for baking. I figured this is all Grandma needed if that, it’s in baking that you need the precise measurements. Most of Grandma’s recipes were committed to memory. Each time I try a recipe it’s requires a bit of work for me to figure out the technique to transform the ingredients in the recipe. So as I was looking through the recipes, I found this recipe for raisin cake. I have no idea the origin of the recipe, but what I do know that making the cake for my sister and mother while working on this blog, we not only enjoyed the cake but all the memories that came along with it.
From by the bay , wishing you a Happy Mother’s Day making your own special memories.
Maryann
blog raisin cake slice
Raisin Pound Cake
Ingredients
Unsalted butter and unbleached all-purpose flour or baking spray for the tube pan
3 cups unbleached all-purpose flour, plus 2 tablespoons
3 teaspoons baking powder
1/4 teaspoon kosher salt
1 pound raisins
1 cup (1/2 pound) unsalted butter, at room temperature
1 1/2 cups superfine sugar
4 eggs, beaten
1 cup whole milk
1 tablespoon grated lemon zest
1 tablespoon grated orange zest
confectioner’s sugar, to dust on top of cake

Directions

Thoroughly butter the bottom and sides of a tube cake pan then coat the sides of the pan with flour, shaking out the excess or spray the sides of the pan with a baking spray.


Make the cake: In a saucepan add raisins and water until the raisins are just covered and bring to a boil. Strain raisins, discarding liquid and cool in a bowl.  After raisins have cooled, add 2 tablespoons of flour to coat the raisins. Preheat oven to 350 degrees F. Sift the flour, baking powder and salt into a bowl. Set aside. In an electric mixer, cream the butter until smooth. Add the sugar gradually, beating until well blended. Add the eggs one at a time, beating well after each addition and scraping down the sides of the bowl once or twice. Beat in the lemon and orange zest. Alternately, add the flour and milk , then the raisins. Pour batter into the greased tube pan. Place on a baking sheet and bake cake for 1 hour and 15 minutes or until a tester comes out of the cake clean. Place tube on baking rack until cool. Use a knife to loosen sides and remove outer rim. Loosen cake around the tube. Take a sheet of parchment paper slightly larger then the cake and cut a hole in the middle to place tube through. Flip cake over into the parchment paper carefully.  Place on top of cake stand. Put the confectioner’s sugar in a sieve and dust the surface of the cake lightly with it. Serve.

Lemon Poppyseed Pancakes with Honey Butter

blog car show 1


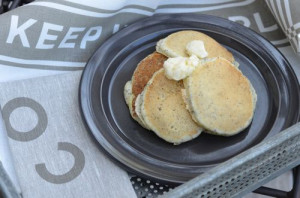
It’s a perfect spring sunday morning by the bay and I’m planning on heading to the beach for the “Annual Car Show”, featuring  a wide variety of vintage cars.  The very thought of the show had me thinking of classics, so I decided on another classic for breakfast my buttermilk pancakes. Much like the enthusiasts who breath new life into these vintage cars, I decided to update my classic recipe with some new ingredients, like lemon juice and zest along with poppy seeds and the results were fantastic. Set the stage for enjoying your next weekend with these delicious pancakes!

From by the bay, wishing you great classic food memories!
Maryann


blog poppy pan


Lemon Poppyseed Pancakes with Honey Butter
Serves 4-6

Ingredients
11/2 cups all purpose flour
2 teaspoons baking powder
1/2 teaspoon salt
1/2 teaspoon baking soda

2 tablespoons poppy seeds

2 tablespoons fine granulated sugar

1 tablespoons lemon zest
2 cups buttermilk

1 tablespoon fresh lemon juice
2 large eggs, at room temperature, separated keep egg white in separate bowl

Directions
In a medium bowl combine all dry ingredients: flour, baking soda, baking powder, salt and poppy seeds and mix. To this add lemon zest and sugar. To the dry ingredients add the wet ingredients the buttermilk, lemon juice and egg yolks and combine- do not over mix. Batter will be a little lumpy. Take the bowl with egg whites and use an electric mixer, beat egg whites until soft peaks. Fold egg whites with rubber spatula into the batter. Set aside for 20 minutes. Spray a griddle pan with cooking spray and heat.  Spread 1/4 cup of batter for each cake, cook  approximately two minutes on the first side, the pancake will just start to bubble slightly on the outer edges and flip and cook another minute. Place on baking sheet and keep warm in oven until all cakes are made and ready to serve. Serve with honey butter and maple syrup.

Honey Butter

Ingredients
1 stick unsalted butter, softened
1 tablespoon honey

Directions
To butter add honey and combine well.

blog car show 2

Ricotta, Pea and Prosciutto Pizza

I’ve gone pea wild! I love spring when fresh peas start to show up in abundance. I was shopping in my favorite food market and found both english peas and sugar snap peas. Of course I couldn’t decide on which to buy, so I bought both and decided to celebrate with a little pea fest in the kitchen. First up is this yummy pizza, make with 3 cheeses and then topped with peas and ham one of those perfect duets in food. I opted for the italian version of this combo and used prosciutto. I wanted to kept the peas fresh, crisp  and vibrant green so I decided to blanch them and toss then over the pizza once it came out of the hot oven. The last touch is grating some fresh lemon zest on top to brighten all the flavors. This is a pizza you’ll want to try as soon as you find some fresh peas, but if you can’t find fresh peas, you can blanch some frozen baby peas and they will work just as well. Enjoy!
From by the bay wishing you pea green food memories!
Maryann
blog pea pizza
Ricotta, Pea and Prosciutto Pizza

Ingredients
no-knead pizza dough for one pizza ( see recipe below)
1/2 cup fresh ricotta cheese
4 ounces fresh mozzarella cheese, shredded or cut into small cubes
1/4 cup grated parimigano reggiano
2 -3 slices San Daniele proscuitto, in strips
1/4 cup fresh spring peas
1/2 teaspoon fresh lemon zest
coarse sea saltDirections
Make pizza as directed below. Blanch peas, by tossing into boiling water for 1 minutes, then strain the peas and place in ice water to stop cooking. Once cooled, strain and dry and set aside as a pizza topping. Once pizza dough is rolled out top with ricotta, mozzarella, grated cheese and strips of prosciutto. Bake as directed. Before serving sprinkle with peas, lemon zest and some coarse sea salt. Serve immediately.

No-Knead Pizza Dough
Adapted from Jim Lahey, Co., as featured on “Tasting Table” 
Makes four 12-inch pizza crusts
Time: About 1½ hours plus 14 to 20 hours’ rising

Ingredients
3 cups all-purpose or bread flour, more for dusting
¼ teaspoon instant yeast (such as SAF brand)
1½ teaspoons salt
1½ cups water

Directions
1. In a large bowl, mix the flour with the yeast and salt. Add the water and stir until blended (the dough will be very sticky). Cover the bowl with plastic wrap and let rest for 12 to 24 hours in a warm spot, about 70°.
2. Place the dough on a lightly floured work surface and lightly sprinkle the top with flour. Fold the dough over on itself once or twice, cover loosely with plastic wrap and let rest for 15 minutes.
3. Divide the dough into 4 pieces and shape each piece into a ball. Generously sprinkle a clean cotton towel with flour and cover the dough balls with it. Let the dough rise for 2 hours.
4. Stretch or toss the dough into the desired shape, cover with toppings and bake on top of a very hot pizza stone or on a oiled baking sheet in a 500 degree F oven for about 8 to 10 minutes until dough is cripsy and golden brown.

Co., 230 Ninth Ave. (at 24th St.); 212-243-1105 or co-pane.com

Brazilian Cheese Puffs

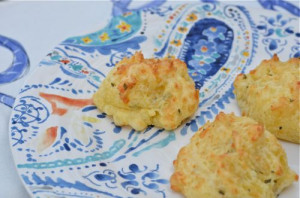
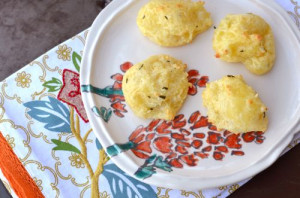
Last month , I was headed into another early morning meeting at work. I had the good fortune to be meeting with someone who is very thoughtful. That morning , she welcomed me with a delightful treat, two delicious brazilian cheese puffs. This was my first time tasting this yummy, light and airy bread. They are crispy on the outside and soft and cheesy on the inside. When I arrived home by the bay that weekend, my sister Nancy welcomed me with the same little treat. Amazing to spend your whole life unaware of something so good and then you experience it twice in one week . I knew then, i needed to figure out to make these little breads myself. So this is the recipe and technique that worked best for me. It’s a hybrid of  several recipes I tried. You can make these in a large size and serve for breakfast ( do adjust the baking time if you do that) or make them in a small bite size as an appetizer to serve along with your favorite wine or cocktail. These are pretty easy to make and definitely worth the time and effort. 

From by the bay, wishing you cheesy food memories!

Maryann

blog cheese puff 1

Brazilian Cheese Puffs
Ingredients

2 cups tapioca flour*
1 cup milk
1/2 cup unsalted butter, 1 stick
1 teaspoon fine sea salt
1 1/2 cups grated Parmesan cheese
2 eggs
* Tapioca Flour can be found at specialty markets such as Whole Foods or Asian markets and is also called manioc starch or tapioca starch.
1 tablespoon fresh rosemary, minced

Directions


 Preheat oven to 450 degrees F. Line two baking sheets with parchment paper. In a medium sauce pan, bring the milk, salt, and butter to a boil, stirring occasionally. Once  the mixture starts to boil remove from heat. Slowly add tapioca flour, stirring constantly until thoroughly mixed.  The dough will be somewhat gummy at this point. Transfer the dough to a standing mixer fitted with a paddle attachement. Beat the dough for a few minutes until it smooths out.  Whisk the eggs in a small bowl and add into the dough 1/2 at a time . Make sure the egg is incorporated into the dough before adding the rest of the egg. With the mixer on medium, beat in the cheese and rosemary until incorporated. Round out the dough onto the parchment lined baking sheet into little mounds spaced apart about 2 inches. Approximately 10 per tray. Place in the oven and immediately turn down the heat to 350 degrees F. Bake for 25 to 30 minutes. They will puff, look dry on the outside and start to turn color. Cool slightly and eat warm.Cooked puffs can be stored, in the fridge as long as it’s kept covered and then reheat in the microwave.
note: I like to mixed my parmesan cheese 1/2 grated and 1/2 shredded for a little more texture. You can also use thyme in place of rosemary or add some mixed garlic in place of the herbs. If you like things spicy, substitute the parmesan cheese for cheddar and replace the rosemary with minced fresh jalapeno.
blog cheese puffs 2


Red Cabbage and Beet Slaw with Goat Cheese

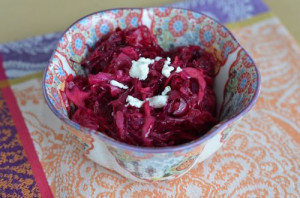
I love looking for inspiration and sometimes the source can be surprising. Such is the case for this delicious slaw made of beets and red cabbage. Both ingredients were left over from “experiments” with natural dyes for color Easter eggs a few weeks ago. I decided to combine the ingredients with really fantastic results for a modern twist on a traditional classic. The color is vibrant and the taste is crisp and fresh. This will definitely be a a go to side dish for many of my summer barbecues.
From by the bay wishing you vibrant food memories!
Maryann

blog red caabage beet slaw

Red Cabbage and Beet Slaw with Goat Cheese
Serves 4 -6 
Ingredients
1 head red cabbage, finely shredded
4 tablespoons red beet, coarsely grated
1/2 cup vegetable oil
1/2 cup apple cider vinegar
1/4 cup granulated white sugar
fine sea salt and fresh ground black pepper to taste
2 ounces crumbled goat cheese
Directions
Place red cabbage and grated beet into a bowl. In a medium sauce pan add the oil, vinegar and sugar and bring to boil until the sugar is dissolved. Pour the hot dressing over the cabbage and beet, add salt and pepper and mix well. Let stand for 1 hour at room temperature before serving or cover and place in the refrigerator until ready to serve. Sprinkle the crumbled goat cheese on top of your salad right before serving.

10 ways to use Dill Pesto

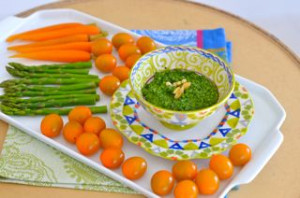
blog dill pesto
Looking in my refrigerator I saw this big bunch of fresh dill left over making my carrot soup with dill, which really requires very little dill at the end of the day. I hate to waste ingredients, so I decided to make some dill pesto sauce, This pesto sauce should be in every cook’s recipe box. It has so many uses, I’ve just listed a quick ten at the end of this blog, but there are many more , many I’m sure I have not even thought of. If you are ever confronted with some leafy green herb left over such as dill, basil, or parsley consider this pesto sauce to be an easy way to use your herbs. I’m using the classic pine nuts here for texture but you could use any raw or toasted nut you prefer, such as walnut or pistashio.

blog dill pesto 2

Lemon Dill Pesto Sauce
Makes approximately 3/4 cup
Ingredients
1 1/2 cups fresh dill
1/2 cup fresh flat leaf parsley
1 garlic clove, smashed
2 tablespoons pine nuts
1 tablespoon fresh lemon juice
4 tablespoons olive oil
1/2 teaspoon fine sea salt
2 tablespoons fresh grated parmesan cheese
Directions
In a food processor add the dill, parsley, garlic and pine nuts. Process until minced. Add the lemon juice, olive oil , cheese and salt and blend into a smooth paste. If you are not using right away don’t add the cheese at this point, you can fold the cheese in to the pesto sauce right before using. You can also use the sauce without the cheese. Depending on personal preferences you might choose to not add the cheese when using with fish.
blog dill pesto 3
10 Ways to use Lemon Dill Pesto Sauce
1.Use to top fish, such as salmon.
2. Add to cooked pasta, toss with a little extra pasta cooking water and more grated parmesan.
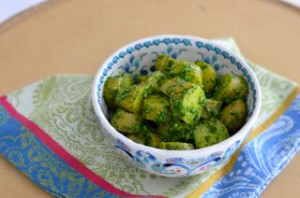
3. Add to cooked potatoes with more olive oil or mayonnaise to make a salad.
4. Serve with fresh vegetables as a dip.
5. Add to some ricotta cheese and mix, making a nice spread for bread as an appetizer.
6. Use as a spread for a sandwich such as chicken on ciabatta bread.
7. Add to tunafish with mayonnaise for a great tunafish salad.
8. Top a fresh vegetable soup such as carrot or pea.
9. Add to mayonnaise as an alternate to tartar sauce.
10. Add more olive oil and a little mustard to make a salad dressing for your greens

—– EXTENDED BODY: —– EXCERPT: —– KEYWORDS: —– COMMENT: AUTHOR: Troy EMAIL: Foxtroy67@gmail.com IP: 70.192.73.20 URL: DATE: 4/4/2013 2:39:40 PM Love this post! Your recipes are always delish…but also love the 10 ideas for other ways to use this recipe. And, I bet it tastes like Springtime! —– COMMENT: AUTHOR: entertaining by the bay EMAIL: maryannkraker@aol.com IP: 63.118.185.66 URL: DATE: 4/4/2013 3:41:32 PM I had to stop myself at 10 ideas…………..it’s so yummy! —– ——– AUTHOR: Petrosonic TITLE: Asparagus and Spinach Lasagna STATUS: draft ALLOW COMMENTS: 1 ALLOW PINGS: 1 DATE: 4/1/2013 8:42:46 PM —– BODY:

Carrot Dill Soup

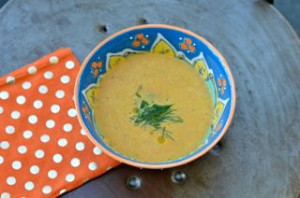
While planning a menu for my Easter brunch by the Bay, I was looking for a clever way to serve carrots with a nod to our small bunny friends. I decided on this delicious and easy carrot soup. The color is a wonderful vibrant orange. The soup is a feast for the eyes and mouth, with the slightest under note of heat to contrast the slightly sweet taste of the carrots.  This soup is great served warm with a dollop of creme fraiche which just melts into the soup or cold with a drizzle of olive oil. Sprinkle fresh chopped dill on top for either version. You can serve the soup in bowls or  in little shot glasses. The bottom line is this soup is great no matter how you eat it! Enjoy this springtime soup!

From by the bay wishing you – springtime food memories!

Maryann

blog carrot dill soup

Carrot Dill Soup

Serves 6


Ingredients

1 tablespoon olive oil

1 tablespoon unsalted butter

1 leek, cleaned, chopped and using the white part

2 cups carrots peeled and sliced

1/4 teaspoon red chili flakes

4 cups chicken broth

1 teaspoon fine sea salt

1/2 teaspoon ground black pepper

4 tablespoons heavy cream

1 tablespoon fresh lemon juice

2 tablespoons chopped dill

Dill chopped and olive oil  or creme fraiche to garnish

Directions 

In a large soup pot heat butter and oil, add leeks and sauté until soft about 5 minutes. Add chili flakes and carrots, sauté for another minute. Slowly add the chicken broth, salt and pepper. Bring to a boil and then simmer for 30 minutes uncovered until the carrots soft. Puree in food processor until very smooth. Stir in lemon juice, dill and heavy cream. Serve soup either hot or cold. Garnish with chopped dill and a drizzle of olive oil or a dollop of creme fraiche.


Ratatouille

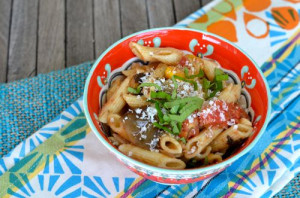
My friend Eva, make my day with a basket of  vegetables, the results of the summer harvest in her garden. The basket was filled with  beautiful eggplants, zucchini, squash and tomatoes. I remembered how my mom Ceil,  would love to make ratatouille every summer using these same ingredients. It was a staple barbecue side dish, when we were in the height of  summer. I’ve tried different variations and this by far is my favorite and reminds me the most of mom’s only with a few extra ingredients to kick up the volume on the taste. Tyler Florence really has the ultimate recipe, so no need for me to mess around. I’ve offered a few suggestions below for ingredient options. For example, instead of opening a tin of anchovies, I always keep a tube of anchovy paste handy in the fridge. I like how the paste just melts into the dish as an ingredient. I made this over the weekend and used the leftovers the next day for pasta.  Celebrate the summer harvest using this recipe!
From by the bay wishing you great summer harvest food memories!
Maryann
blog ratato pasta
Ratatouille 
Serves 4
Adapted from Tyler Florence – “Tyler’s Ultimate” published in 2006
Ingredients
1/3 cup plus 1/2 cup extra-virgin olive oil, divided
1 pound small Italian eggplants, cut into 1-inch cubes
Kosher salt and freshly ground black pepper
1 pound zucchini, cut crosswise into 1-inch sections
3 anchovy fillets, finely minced or 2 teaspoons anchovy paste
2 onions, finely chopped
3 garlic cloves, finely chopped
1/4 cup chopped fresh flat-leaf parsley
Leaves from 1/2 bunch fresh basil, coarsely chopped
Leaves from 4 fresh thyme sprigs
2 pints cherry tomatoes or 3 medium size Heirloom tomatoes, chopped
1 dried chile or 1 teaspoon dried red chili flakes
Splash balsamic vinegar

Directions
Line a large platter with paper towels. Heat 1/3 cup olive oil in a medium saucepan over medium heat. Add the eggplant, season generously with salt and pepper, and let that cook down for 10 to 12 minutes, until the eggplant is soft and wilted. Remove the eggplant from the pan and onto a platter to drain. Next stop, zucchini: cook it the same way in 1/4 cup oil, then add it to the platter with the eggplant.

Add another 1/4 cup olive oil to the pan, then the anchovies or paste, onions, garlic and herbs. Cook for 5 to 7 minutes, until the onions get nice and caramelized. Add the tomatoes and cook that down for 10 to 12 minutes, until pulpy. Return the eggplant and zucchini to the pan, crack open the chile, and add that too or season with red chili flakes. Season with salt and pepper and let the ratatouille cook slowly for about 20 minutes, until the mixture is soft, mushy and juicy; you want all the flavors to come together. Stir in the vinegar and let cool to room temperature.

Read more at: www.foodnetwork.com/recipes/tyler-florence/the-ultimate-ratatouille-recipe2/index.html?oc=linkback

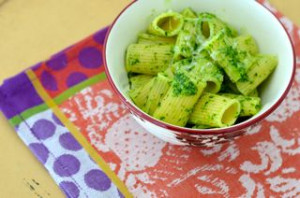
Cook pasta according to directions. Once cooked set aside 1/2 cup cooking water. Place the penne in a bowl, top with room temperature ratatouille, grated cheese and cooking water. Mix well. Top with a little more grated cheese and basil. Serve immediately. 

Natural Egg Dye

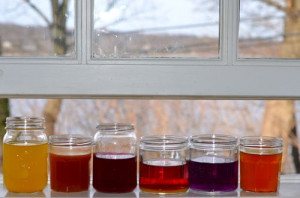
Last year I make for the first time, red eggs for Greek Easter using onion skins. I was amazed at how easy and beautiful the eggs turned out. So for Easter this year, I plan on making naturally dyed Easter Eggs in different colors using vegetables and spices many of us already have at home. I had to experiment a little to find what worked best. I suggest using either glass jars with a lid since the natural dyes take longer to color, it’s easiest to make the eggs and dyes and close the jar and store them in the refrigerator over night. The eggs will not have the same uniform color as store bought dyes but I think that gives the eggs a more organic and rustic charm. Many of the dyes needed a cup of boiling water added to an ingredient so I suggest putting the ingredients in a jar while the water is boiling and you will save some time. Below are my favorite dyes! Enjoy!

From by the bay wishing you colorful food memories!
Maryann
blog red eggs
Making the Perfect Hard Boiled Egg
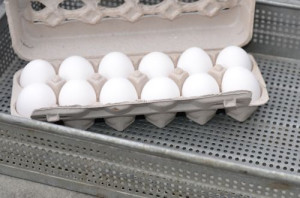
Place eggs in the bottom of a large pot add water to just cover the eggs along with a little sea salt and place on medium heat. Bring water to a boil. Remove from heat and cover with a lid for 13 minutes. Use a timer to make sure you are not over cooking your eggs. Once the eggs are done, run them under cold water to cool to stop them from cooking. The result will be a perfectly cooked hard boiled egg.
A Few Suggestions While Coloring Your Eggs

To start I suggest using glass jam jars with covers or 16 ounce plastic deli containers with lids. Add the cooled hard boiled eggs to the natural dyes. Make sure eggs are completely submerged in the dye, add a little water if the eggs are not covered. Place a lid on your container and place into the refrigerator overnight for intense colors. If you want softer color you can let eggs sit in dye for just a few hours in the refrigerator. Add hard boiled eggs to the dye once cooled unless recipe says otherwise. When making the dyes, I suggest using plastic gloves so not to stain your fingers.
blog egg dye
Natural Egg Dye Recipes
Red Beets / Pink Eggs  – Grate 4 tablespoons of red beets and add to a heat safe container. Add 1 teaspoon white vinegar and 1 cup boiling water. Let sit for 1 hour, strain and add eggs to dye.
Red Cabbage/ Blue Eggs – Add 3 tablespoons chopped red cabbage to a heat safe container. Add 1 teaspoon white vinegar and 1 cup boiling water. Let sit for 1 hour, strain and add eggs.
Annatto Seeds/ Reddish Golden Color – Add 2 tablespoons annatto seeds ( achiote seeds) to 1 cup of water, bring to a boil for about 5 to 7 minutes. Strain. Add eggs to the dye.
Red Cabbage and Turmeric Powder/ Green Color – Add 3 tablespoons chopped red cabbage and 1/2 teaspoon turmeric powder to a heat safe container. Add one cup of boiling water. Let sit for 1 hour, strain and add eggs. The result is a speckled color.
Turmeric Powder/ Deep Gold Color – Add 2 teaspoons ground turmeric powder to a heat safe container. Add  1 teaspoon white vinegar and one cup of boiling water. Once dye is cool add eggs . Rinse off any residual powder.
Paprika Powder/ Light Orange – Bring one cup of water and 1 tablespoon of white vinegar to a boil, add 1 tablespoon paprika and continue to boil for 15 minutes. Place in a heat safe container, add eggs to dye while warm. Rinse off any residual powder.Here is the post to make red dyed eggs:https://blog.entertainingbythebay.com/2012/04/03/easter-eggs-with-natural-red-dye.aspx

blog eggs

Old Bay Baked Fries

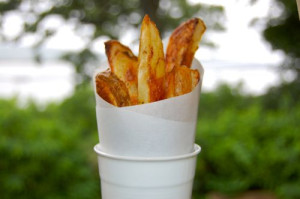
Old Bay Seasoning is a favorite seasoning mix here by the bay, I’d like to say its’ the name, but that is not quite true. Old Bay is a wonderful combination of 12 spices including ginger, cinnamon, clove, mace, bay laurel, just to name a few. It adds a lot of flavor making these baked oven fries both delicious and easy!! This is a great easy side dish to add to almost any meal!
From by the bay wishing you yummy old bay food memories!
Maryann
blog fries
Baked Old Bay Fries
Serves 4 
Ingredients
2 pounds Idaho potatoes, cleaned with skin on and cut into wedges
non stick olive oil spray
2 tablespoons olive oil
2 tablespoons Old Bay Seasoning
1/2 teaspoon fine sea salt
extra coarse sea salt such as Maldon to season after baking
Directions
Preheat oven to 375 degrees F.  In a large size bowl add potatoes, 2 tablespoons olive oil, Old Bay Seasoning and fine sea salt. Mix well. Spray 2 non stick baking sheets with the olive oil spray. Place seasoned potatoes onto the baking sheets in a single layer. Spray again lightly with olive oil spray so the potatoes will brown in oven. Bake in the oven for 45 minutes until brown, do not turn while cooking. When browned, remove from oven and sprinkle with coarse sea salt. Serve immediately.