Category Archives: cakes

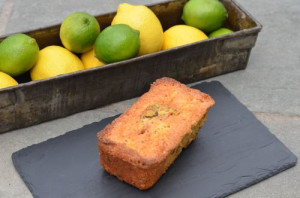
Citrus Pistachio Pound Cake from The Tasting Room

blog pist cake


Citrus Pistachio Pound Cake
Recipe published in Bon Appetit 2012 from The Tasting Room in Houston Texas

Ingredients
Nonstick vegetable oil spray
2 cups all-purpose flour plus more
1 1/2 teaspoons kosher salt
1 teaspoon baking powder
1 cup (2 sticks) unsalted butter, room temperature
2 cups sugar
5 large eggs
2 tablespoons fresh lemon juice
2 tablespoons fresh orange juice
2 teaspoons finely grated orange zest
1 teaspoon finely grated lime zest
1 cup shelled, unsalted pistachios, coarsely chopped, divided

Directions
Arrange a rack in middle of oven; preheat to 325°. Coat a 9x5x3″ loaf pan with nonstick spray. Dust pan with flour; tap out excess.Whisk 2 cups flour, salt, and baking powder in a medium bowl. Using an electric mixer, beat butter on medium speed until light and fluffy, 2–3 minutes. Add sugar; beat until well incorporated, 1–2 minutes. Add eggs one at a time, beating to blend between additions. Add juices and zests; beat until well combined (mixture will look curdled), 2–3 minutes. Add dry ingredients; reduce speed to low and beat just until blended. Fold in 3/4 cup pistachios. Pour batter into prepared pan; smooth top. Sprinkle remaining 1/4 cup pistachios over.Bake cake, rotating halfway through, until a tester inserted into center comes out clean, about 1 1/2 hours. Transfer to a wire rack and let cool completely in pan. Run a sharp knife around sides to loosen; unmold cake. DO AHEAD: Can be made 1 day ahead. Store airtight at room temperature.

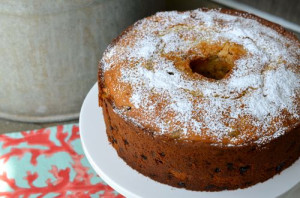
Raisin Pound Cake

blog raisin cake
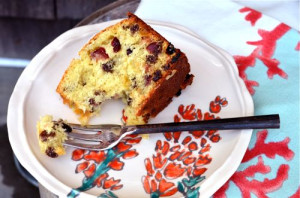
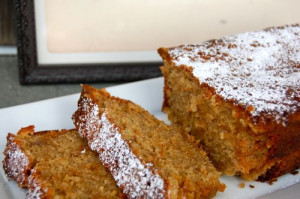
As I was thinking about what to write for my Mother’s Day blog, I decided to look through my Grandmother’s recipes. I love looking at the tattered, fragile pieces of paper, remembering the recipe, the family gathered for some occasion or just an ordinary day made special with the love that comes along with the food. The recipes are all hand written, many of them just a list of ingredients mostly for baking. I figured this is all Grandma needed if that, it’s in baking that you need the precise measurements. Most of Grandma’s recipes were committed to memory. Each time I try a recipe it’s requires a bit of work for me to figure out the technique to transform the ingredients in the recipe. So as I was looking through the recipes, I found this recipe for raisin cake. I have no idea the origin of the recipe, but what I do know that making the cake for my sister and mother while working on this blog, we not only enjoyed the cake but all the memories that came along with it.
From by the bay , wishing you a Happy Mother’s Day making your own special memories.
Maryann
blog raisin cake slice
Raisin Pound Cake
Ingredients
Unsalted butter and unbleached all-purpose flour or baking spray for the tube pan
3 cups unbleached all-purpose flour, plus 2 tablespoons
3 teaspoons baking powder
1/4 teaspoon kosher salt
1 pound raisins
1 cup (1/2 pound) unsalted butter, at room temperature
1 1/2 cups superfine sugar
4 eggs, beaten
1 cup whole milk
1 tablespoon grated lemon zest
1 tablespoon grated orange zest
confectioner’s sugar, to dust on top of cake

Directions

Thoroughly butter the bottom and sides of a tube cake pan then coat the sides of the pan with flour, shaking out the excess or spray the sides of the pan with a baking spray.


Make the cake: In a saucepan add raisins and water until the raisins are just covered and bring to a boil. Strain raisins, discarding liquid and cool in a bowl.  After raisins have cooled, add 2 tablespoons of flour to coat the raisins. Preheat oven to 350 degrees F. Sift the flour, baking powder and salt into a bowl. Set aside. In an electric mixer, cream the butter until smooth. Add the sugar gradually, beating until well blended. Add the eggs one at a time, beating well after each addition and scraping down the sides of the bowl once or twice. Beat in the lemon and orange zest. Alternately, add the flour and milk , then the raisins. Pour batter into the greased tube pan. Place on a baking sheet and bake cake for 1 hour and 15 minutes or until a tester comes out of the cake clean. Place tube on baking rack until cool. Use a knife to loosen sides and remove outer rim. Loosen cake around the tube. Take a sheet of parchment paper slightly larger then the cake and cut a hole in the middle to place tube through. Flip cake over into the parchment paper carefully.  Place on top of cake stand. Put the confectioner’s sugar in a sieve and dust the surface of the cake lightly with it. Serve.

Pumpkin Coffee Cake with Brown Sugar Streusel

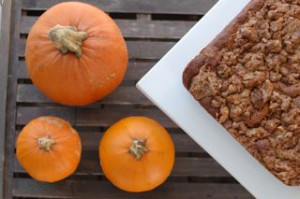
blog pumpkin coffee cake 1


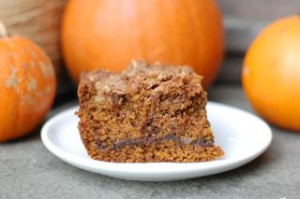
If you read New York Magazine, you would have heard that pumpkin is the new bacon ( See link below). I’m not sure I would agree with that statement , however, I sure do love to cook with pumpkin this time of year. I can’t think of a better way to help celebrate Halloween than baking , especially with pumpkin! I was experimenting in the kitchen with some of my favorite ingredients to come up with this delicious and rich coffee cake. It has everything I like best in a good coffee cake, a wonderful streusel topping , with the added crunch of some walnuts. In my family we love the crumbs on top, so this recipe has plenty of crumbs and they are large and chunky when I toss them on top of the batter. The cake is moist from using both pumpkin puree and sour cream. To add to the richness is a nice layer of brown sugar filling. When baking the house is just filled with the delicious aroma of cinnamon and brown sugar. You’ll want to eat this the second it comes out of the oven, but it really needs to cool so that you can enjoy all the layers of flavor. Try to resist or you’ll just to have to eat some twice, warm and then cool as well. The trouble is this cake will just disappear……….probably the ghosts and ghouls have gotten to the cake !

http://nymag.com/news/intelligencer/pumpkin-2012-10/

From by the bay wishing you pumpkin, cinnamon and brown sugar food memories!
Maryann
blog pumpkin coffee cake

Pumpkin Coffee Cake with Brown Sugar Streusel
Serves 6-8
Ingredients

Streusel Topping

3/4 cup all purpose flour
1/4 cup
 granulated sugar

1/2 cup dark brown sugar
1/2 cup chopped walnuts

2 teaspoons cinnamon powder
1/4 teaspoon fine sea salt

6 tablespoons melted unsalted butter

Filling
1/2 cup dark brown sugar
2 teaspoons cinnamon


Cake

8 tablespoons unsalted butter, room temperature

1/2 cup dark brown sugar

1/2 cup granulated sugar

2 eggs
1/2 cup pumpkin puree ( canned)
1/2 cup sour cream
1 1/2 cups all purpose flour
2 teaspoons baking powder

1/2 teaspoon baking soda

2 teaspoons cinnamon powder
1 teaspoon ground ginger
1/4 teaspoon grated nutmeg

Directions

Preheat oven to 350 degrees F. Butter and flour an 8” square baking pan. ( I find an 8″ square glass baking dish works best).  Make the topping for cake by combining all dry ingredients in a bowl. Stir in melted butter and make large  chunky crumbs, between 1/4″ to 1/2″ inch depending on preference.  Place crumbs onto a parchment lined baking sheet and put into the refrigerator to cool for about 15 minutes.  To make filling combine the dark brown sugar and cinnamon in a bowl and set aside.To make cake batter sift together the flour, baking powder, baking soda, cinnamon, ginger, nutmeg and salt in a bowl. Use an electric mixer to cream butter and sugars together until fluffy. Add eggs one at a time and beat well. Mix in the flour alternately with the sour cream and pumpkin puree and mix well. Once combined pour half the batter into the prepared baking pan and spread out with a spatula. Sprinkle the filling evenly atop the batter. Spread the remaining batter on top of the filling. Use a table knife to gently swirl the filling into the batter. Sprinkle the streusel topping over the top of the batter. Place in the oven to bake until golden brown  and a cake tester comes out clean, when inserted into the center of the cake. This is approximately 50 to 55 minutes. Remove the cake from oven and let cool on cake stand about 20 minutes before removing from pan to serve.

Rosemary Sandcake

blog sandcake

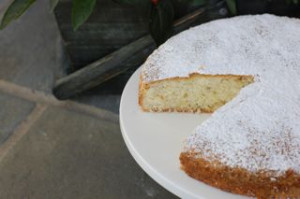
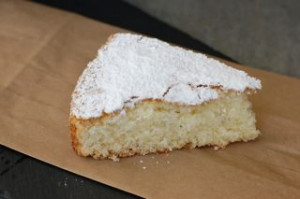
Not long ago I was looking for a light easy dessert to complete a meal celebrating the end of summer. I stumbled on this recipe in one of my many cookbooks. The name of the cake was the first draw.  I love rosemary and grow it right outside my kitchen door. Second, sand cake reminds me of the beach. As I read the recipe I was intrigued.  I had never used potato starch in my baking before. I found that using the potato starch made for an interesting soft texture, that crumbles slightly but remains moist. This is one spectacular cake! It has a lovely lemony taste with just a hint of rosemary. Michael Chiarello suggests that this cake be eaten the day that you make it, so I will too, although there really was no cake left to see how it tastes the second day. I’m sure you will enjoy this cake as much as we did here by the bay.

From by the bay , wishing you sandy food memories!
Maryann

blog sand cake 2


Rosemary Sandcake
Recipe: Michael Chiarello from “Casual Cooking Cookbook”
IngredientsCake
Unsalted butter and unbleached all-purpose flour for the cake pan
1 1/3 cups sifted potato starch (not potato flour)
1 1/2 teaspoons baking powder
1 cup (1/2 pound) unsalted butter, at room temperature
1 cup plus 1 tablespoon superfine sugar
3 eggs, separated
2 tablespoons grated lemon zest
1 tablespoon finely minced fresh rosemary
1/2 teaspoon pure vanilla extract

For serving:
Confectioners’ sugar
3 pints mixed summer berries or 6 peaches, peeled and sliced, or a combination
Granulated sugar
Lightly whipped heavy cream

Directions

Thoroughly butter the bottom and sides of a 9-inch round cake pan with 2-inch sides. Line the bottom with a round of parchment paper. Coat the sides of the pan with flour, shaking out the excess.Make the cake: Sift the potato starch and baking powder into a bowl. In an electric mixer, cream the butter until smooth. Add the 1 cup sugar gradually, beating until well blended. Add the egg yolks one at a time, beating well after each addition and scraping down the sides of the bowl once or twice. Beat in the lemon zest, rosemary, and vanilla. By hand, stir in the dry ingredients just until blended.

Beat the egg whites and the remaining 1 tablespoon sugar to soft peaks. Fold half of the beaten whites into the potato starch mixture to lighten it, then gently fold in the remaining whites. Transfer the batter to the prepared pan, leveling it with a spatula.

Place in a cold oven and turn the thermostat to 350ºF. Bake until the cake is well risen, nicely browned, and beginning to pull away from the sides of the pan, 50 to 55 minutes. Let cool completely in the pan on a rack, then invert onto the rack and carefully remove the parchment paper. Invert again onto a serving platter. Put the confectioner’s sugar in a sieve and dust the surface of the cake lightly with it.

Thirty minutes before serving, put the fruit in a bowl, add granulated sugar to taste, and crush the fruit with a fork until it is roughly mashed. Let it stand 30 minutes to render some juice.

Cut the cake into 12 slices. Serve a slice of cake with crushed fruit spooned over and around it and a dollop of whipped cream on the top or alongside.

Blackberry Buttermilk Coffee Cake

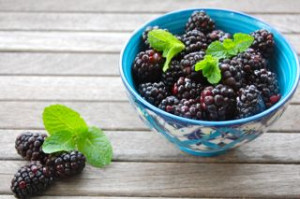
blog bowl of blackberries

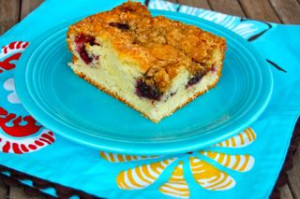
I grew up in New York City. My back yard was the hard gray pavement. Most of my childhood games were played on the sidewalk, games such as hopscotch, jump rope and stick ball. Every summer though my family would go on vacation and we would spend two glorious weeks away from the city. We would drive up to the Adirondack Mountains and stay at a cabin on Loon Lake. Much like Dorothy, my world went from Black and White to Technicolor. The cabin was in a wooded area just a short walk from the lake. The surrounding woods were filled with little paths to other cabins. Every afternoon I would take a long walks along the paths.  The woods were filled with blackberries, raspberries and blueberries. I would fill my pail each afternoon and return to the cabin. Many days I would return from my walk and my sisters and I would just eat the berries straight from the pail, too impatient to make them into a dessert. But on those few days that we controlled our impulses to eat those berries immediately we would stand at mom’s side and make a dessert.  We kept our desserts pretty simple: pies, cobblers and crisps. The blackberries almost never lasted until the morning so I bought enough recently so that I could make this delicious coffee cake, it’s moist and slightly sweet bursting with blackberries. Even better is how easy it is to make. Picking and cooking with blackberries were some of the happiest and most delicious moments of my life.

From by the bay wishing you delicious blackberry memories!
Maryann

blog blackberry coffee cake

Blackberry Buttermilk Coffee Cake
Ingredients
1 1/2 cups all purpose white flour
2 teaspoons baking powder
1 teaspoon salt
1/3 cup canola oil
1/2 cup granulated white sugar
1 egg
2/3 cup buttermilk
5 ounces fresh blackberries
For crumb topping
1/3 cup all purpose white flour
3 tablespoons granulated white sugar
3 tablespoons dark brown sugar
1/2 teaspoon cinnamon powder
1/4 cup cold butter, cut into pieces ( 1/2 stick)
Directions
Preheat oven to 375 degrees F. Grease a non stick 8″ square baking pan and cover bottom with a square piece of parchment paper. In a small bowl add the flour, baking powder and salt and mix. In a medium size bowl add the oil, sugar and egg. Beat using a spoon until well combined. Slowly add the flour and buttermilk alternately, blending well after each addition. Turn batter into the greased pan. Top with the blackberries. In another bowl add the ingredients for the crumb topping and mix well using your fingers until butter is incorporated and texture is crumbly like sand. Sprinkle evenly on top of the batter. Place pan on a baking sheet and bake for 40 to 45 minutes, until a tester comes out clean. When cake comes out of the oven let cool 5 minutes and then loosen the sides with a knife . Let cool another 5 minutes and turn onto a wire rack. Remove the parchment paper and let cool another 10 minutes. Place on a serving plate . This is great to serve warm or at room temperature.

Lemon Bars

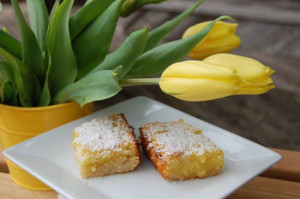
When I think of Mother’s Day, of course my own mother and grandmothers come to mind. Part of their legacy to me is my passion for cooking. I stood at their side just a little girl as an eager student. When I think of making this recipe for lemon bars, I think of my niece, eager at 6 years old , ready to learn to cook. My niece helped me every step of the way. Ashley squeezed the lemons, made the dough, her tiny fingers pressing the shortbread into the bottom of the pan.  I will never forget the look of pride on her face when the lemon bars were done and she served them to the family. Sharing my passion with my young niece was a very special way to celebrate Mother’s Day!

From by the bay wishing you all very special Mother’s Day food memories!
Maryann

blog lemon square

Lemon Bars
makes 9 bars or 18 small bites

Crust:
1 cup flour
1/2 cup confectioner’s sugar, plus more for dusting bars
pinch salt
1 stick  unsalted butter softened, plus more for greasing

Filling:
3 eggs
1 1/2 cup fine sugar
1 tablespoon lemon zest
1/2 cup fresh lemon juice
1/2 cup flour
1/2 teaspoon baking soda

Directions

Preheat oven to 350F. Lightly grease a non stick pan 8 by 8
Make the crust by combining  flour, confectioner’s sugar, salt into a bowl. Add butter and mix with your hands to make pea size crumbs.  Turn into the greased pan and press the dough down into the bottom of the pan covering it all. Place in oven and bake for 20 minutes. Take out and cool.
While crust is baking make filling by using an electric mixer to combine the eggs, sugar, zest, juice, flour and baking soda. Mix until smooth. Pour filling into baked crust and bake for 35 minutes until filling is set. Take out of the oven let cool and cut into 9 bars. Dust with confectioner’s sugar and serve.

Banana Foster Pound Cake

I love Banana Foster! This recipe originated at Brennan’s of New Orleans in 1951. It’s a wonderful flambe dessert using bananas, rum, brown sugar , cinnamon, butter and heavy cream .  When I saw Giada De Laurentis make her peanut butter and caramel pound cake, I immediately tested it and enjoyed it. I’m not the biggest fan of peanut butter, so I decided to make a version of that recipe into some of my favorite flavors inspired by bananas foster. It was a big smash with my guests, so sharing my version of the recipe with you today!
blog banana foster
Banana Foster Pound Cake
Makes one 9″x5″x3″ Loaf
Adapted from Giada De Laurentis – “Peanut Butter Caramel Pound Cake”

Ingredients
20 caramels, such as Kraft soft caramels unwrapped
1/4 cup heavy cream
2 tablespoons dark rum
1 cup flour
1/2 teaspoon baking powder
1/2 teaspoon salt
1/2 teaspoon cinnamon
1 1/2 sticks unsalted butter, softened
1 1/4 cup light brown sugar
3 eggs room temperature
1 teaspoon vanilla
2 mashed ripe bananas
confectioner’s sugar to dust
Directions
Preheat oven to 350 degrees F. Spray a 9″x5″x3″ loaf pan with cooking spray and line with parchment paper. Spray again. In a small sauce pan add caramels and heavy cream , cook on low heat until melted and smooth stirring frequently. Remove from heat and add the rum and stir. Place aside to cool slightly. In a bowl sift together the flour, salt, baking powder and cinnamon. In the bowl of an electric mixer fitted with the paddle attachment, beat together the butter and sugar, until fluffy about 1 minute. With the mixer on low, add the eggs and vanilla. Slowly add the flour mixture and combine. Combine the bananas into the batter. Pour half the batter into the loaf pan. Pour 2 tablespoons of the caramel sauce into the batter and swirl with the tip of a knife. Pour the remaining batter on top and add 2 more tablespoons of the caramel sauce. Swirl again with the knife tip. Bake in the oven for approximately 1 hour, until cake tester comes out clean. Cool in the pan for ten minutes then remove and place on a wire rack removing the parchment paper. Cool for at least an hour. Serve as is or with the remaining caramel sauce and vanilla ice cream.

Mini Chocolate Cheesecakes

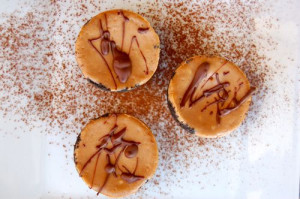
I love making bite size portions of food, especially dessert. It’s a great way to indulge in dessert without the guilt. Try making these little chocolate cheesecakes, they are rich and moist, drizzled with a little swirl of chocolate and then covered with a dusting of cocoa powder “snow”, they look as delicious as they taste. These are easy to whip up and look like a lot more effort then they take to prepare. Indulge in these tasty little bites today.

From by the bay wishing you sweet mini food memories!
Maryann
blog mini cheesecake

Mini Chocolate  Cheesecakes

Makes 24 pieces


Crust:
9 ounces chocolate wafer cookies
½ cup melted unsalted butter

Filling
8 ounces cream cheese, softened
2 tablespoons sugar
1 egg
2 tablespoons sour cream

4 tablespoons chocolate syrup
½ teaspoon vanilla

Topping
2 ounces bittersweet chocolate


Directions

Preheat oven to 375 degree F.  To make crust use food processor to finely grind the wafers, then add the melted butter and process until moist. Take out and divide between  two 12 cup mini muffin tins. Press the mixture down and push up along the sides using your fingertips. Refrigerate for 30 minutes.

To make the filling : Use  the food processor to combine the cream cheese and sugar until fluffy. Make sure to scrape down the mixture with a spatula from the sides of the bowl. Add the egg and continue to beat. Next add the sour cream, vanilla and chocolate syrup until all is well blended and smooth.

Pour the cheese mixture into a cup and pour into the cups – filling each almost to the top.  Place the muffin tins onto a baking sheet and place in the oven in the center rack. Bake for 15 minutes until set. Remove from oven and cool on a wire rack. Refrigerate for at least  3 hours. To top, place chocolate into microwave for 30 seconds. Mix and place into microwave another 30 seconds. Remove and stir until all the chocolate is melted. Using a spoon, dip into the chocolate and shake over the cheesecakes , creating thin lines of chocolate, place back into the refrigerator to harden another 1 hour. Remove from the refrigerator and gently lift each cup out of the tins using a knife or small spatula and serve immediately of place covered back into the refrigerator until ready to serve.

Very Cherry Chocolate Cake


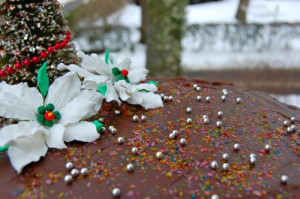
When Neil Diamond released his Cherry Cherry Christmas song, I embraced that message with my cooking. I enhanced a recipe I had kept over the years from Bon Appetit Magazine. The recipe is for a dense Chocolate cake topped with a rich chocolate ganache, which I often  included during my holiday entertaining. This cake, though really became special  for that Cherry Cherry Christmas, by amping up the cherry flavors by using dried cherries and kirsch along with a little excessive decorating over the chocolate ganache. I think the desserts served at the end of your Christmas meal , should look spectacular and feel like magic. I have an arsenal of edible decorations I collect during the year to give that magic factor to my desserts. One of my favorites is edible glitter in multi colors. It’s so much fun to sprinkle this on top of your desserts. Why not try this terrific cake and create your own dessert magic this Christmas! 
From by the bay …………..
Just a very merry, cherry cherry Christmas.And if all of those who love you gather near,you’ll have a very merry, cherry cherry, holly holy,rock and rolly Christmas this year
Read more: NEIL DIAMOND – CHERRY CHERRY CHRISTMAS LYRICS http://www.metrolyrics.com/cherry-cherry-christmas-lyrics-neil-diamond.html#ixzz1guZA1SYr
Copied from MetroLyrics.com

blog xmas cake

This recipe is adapted from a recipe by Rich Rodgers , originally printed in Bon Appetit  Magazine Dec 2003.   

Very Cherry Chocolate Cake

Serves 8-10

Cake

1 cup dried cherries

1/3 cup Kirsch ( cherry liquor)

1 cup ( sticks) unsalted butter, cut into pieces

12 oz. semisweet chocolate, chopped

1 ½ cup sugar

6 eggs, room temperature

2/3 cup flour

½ teaspoon salt

Glaze

1 cup heavy cream

10 oz semisweet chocolate, chopped

¼ cup Kirsch

Decoration

Edible glitter

Edible sugar flowers

Silver dragees

Directions for cake

Preheat oven to 350F. Butter and flour a 9 inch spring form pan. Line the bottom of the pan with a piece of parchment paper. In a small sauce pan add the dried cherries and kirsch. Bring to a low simmer for about 1 minute. Remove from heat and cool. Drain the cherries and keep the liquor  and cherries both in bowls separate to be used later. In another sauce pan melt the butter and then remove from heat. Add the chocolate pieces and let sit one minute. Whisk the chocolate until melted and smooth. Whisk in the sugar and then the eggs one at a time. Whisk in the reserved liquor.  Add the flour and salt and whisk again until blended. Stir in the dried cherries and then pour into the spring form pan. Place in the oven onto the center rack and bake for 1 hour. Use tester to make sure the center of the cake is done. Tester should come out moist but with no batter attached. Remove from oven and cool completely on a wire rack. ( Can be made one day ahead and kept covered at room temperature.)

Directions for glaze

Place cream in medium saucepan and bring to a simmer. Remove from heat and add chocolate. Whisk until chocolate is melted and smooth. Add Kirsch and whisk again until smooth. Allow glaze to cool and thicken for about two hours in saucepan stirring occasionally. At this point the glaze should be thick yet pourable. While glaze is thickening, turn cake out onto the wire rack and remove the bottom of the spring form pan as well as the parchment paper. Place cake with rack into a baking sheet lined with aluminum foil. When glaze is ready, pour half of the glaze onto the cake and use a spatula to smooth over the top and the sides of the cake. Place into the freezer to set for about ten minutes. Remove from freezer and pour the remaining glaze over the cake and smooth evenly again with the spatula. Place again in the freezer for another 15 minutes . Remove from freezer and decorate with edible sugar and sugar flowers. Keep in the refrigerator until 1 hour before serving. Cut into wedges and serve.


Star Spangled Desserts

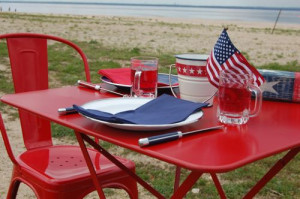
blog 4th table

Article first published as Star-Spangled Desserts on Technorati.

I love holidays! The 4th of July is no exception. I enjoy creating wonderful memories with my friends and family gathered together by the bay for a special celebration! We gather in early evening , sitting out of doors sharing a meal focused on food made on the grill. When dusk arrives, we have dessert and watch fireworks from the deck over the bay, as each town adds some spectacular colors to the sky. The desserts need to be as special as the firework displays in the sky. Here are a few of my favorite star spangled desserts to try for your own celebration.

From by the bay wishing you the happiest 4th of July food memories!
Maryann


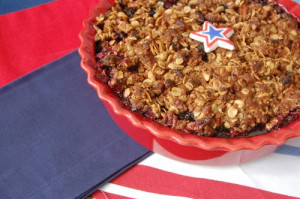
blog berry crisp


Red and Blue Berry Firework Crisp
Serves 4 to 6
Topping
1/2 cup  unsalted butter (1 stick), melted
3/4 cup rolled oats
1/2 cup crushed store bought oatmeal cookies
1/2 cup all purpose flour
1/2 cup dark brown sugar
1/2 cup chopped pecans
1 teaspoon ground cinnamon
Filling
4 cups mixed berries – raspberries and blueberries
1 tablespoon cornstarch
1/4 cup granulated white sugar
1/2 teaspoon raspberry liquor

Preheat oven to 400 F. Place all ingredients for topping in a bowl and mix well. In a a shallow baking dish add the berries , cornstarch, sugar and liquor. Mix well. Cover the berries with topping. Place dish on a baking
sheet in to the oven and bake for 25 minutes. Remove from oven and cool. Serve at room temperature as is or serve with ice cream or whipped cream.

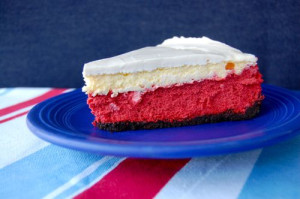
blog red velevet cheesecake

Red Velvet Cheesecake
Crust:
2 cups chocolate wafers
4 tablespoons melted unsalted butter
2 tablespoons light brown sugar

Filling
20 ounces cream cheese
1/2 cup sugar
3 eggs plus 3 egg yolks
2 tablespoons melted chocolate
1 tablespoon red food coloring
1 tablespoon vanilla

Topping
1 cup sour cream
1 tablespoon fine sugar

1 teaspoon vanilla

1/2 teaspoon red food coloring

Directions

Preheat the oven to 350F. Take a 9 inch spring form pan and line with aluminum foil wrapping the outside twice. It’s important to keep water out when cooking with bain marie. To make crust use food processor to finely grind the wafers, then add  sugar and melted butter and process until moist. Take out and place in bottom of spring form pan. Press down with fingertips to cover the bottom of pan. Bake the crust until set about 12 minutes. Cool crust.

To make the filling : Using an electric mixer beat the cream cheese and sugar. Make sure to scrape down the mixture with a spatula from the sides of the bowl. Add the eggs and continue to beat. Next add the vanilla until all is well blended. Take a bow and add 1/3 of the batter. To the batter add the melted chocolate and food coloring.

Pour the chocolate cheese mixture onto the cooled crust in the spring form pan. Next pour on top the remaining batter.  Place the pan into a roasting pan add hot water to the roasting pan until it’s half the height of the spring form pan. Place in oven and bake for 50 minutes. In themeantime, make sour cream topping by combining the sour cream, sugar and vanilla. After the cheesecake has baked for 50 minutes remove from oven and spread the sour cream topping evenly across the top. Place back into the oven for another 10 minutes,. At this point the cheesecake should be set. Take out of the oven. Remove carefully from the bath. Transfer to a wire rack to cool. Cover with foil and place in refrigerator over night to set.