Category Archives: desserts

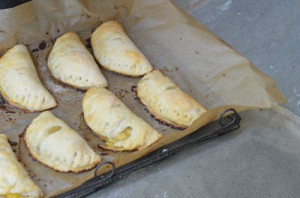
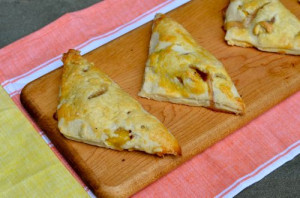
Peach Basil Hand Pies

blog peach basil
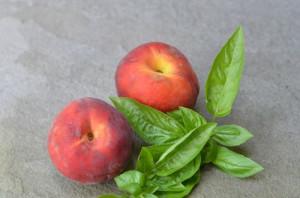
Sometimes all you need is just a little bit of pie. Pie that can be held in the hand and eaten on the go, at a picnic or just taking a walk. We’ve reached that glorious time that arrives each summer when fruit is plentiful and your “big” decision is which fruit should you get for your dessert. Peaches definitely come to mind for me. I decided to make little hand pies over the weekend, filled with peaches and a touch of  sweet basil from the garden to add a slightly spicy undertone to the filling. It’s the perfect little summer treat!
From by the bay wishing you, tasty little peach pie food memories!
Maryann
blog peach hand pie 2
Peach Basil Hand Pies
Makes 6 pies

Ingredients
1 recipe flaky pie dough ( see recipe below)
2 cups fresh chopped peaches, stoned and skinned
2 teaspoons sweet basil, chopped
3 tablespoons fine granulated sugar
2 tablespoons cornstarch
1/8 teaspoon fresh ground black pepper
1/8 teaspoon fine sea salt
1/8 teaspoon ground cinnamon
1/2 teaspoon rice wine vinegar
1 egg, slightly beaten
Directions
Preheat oven to 375 degrees F. Line 2 baking sheets with parchment paper. To make the filling add into a medium bowl the peaches, basil, 2 tablespoons sugar, cornstarch, pepper, salt, cinnamon and rice wine vinegar. Mix well and set aside. Dust your work surface with flour and roll out your pie crust into a 20 inch square. Cut the dough into eight 5 inch squares. Working with each square individually, place 2 tablespoons of filling in the center. Brush the two connecting edges with egg and fold in half making a triangle.  Press the ends together to seal. Place onto the parchment line tray. Use knife to trim uneven edges. Repeat with remaining squares. Brush the top of each pie with remaining egg wash and sprinkle the remaining sugar on top. Make a small slit on the top of each pie fro steam to escape. Place in the oven and bake for approximately 25 minutes until filling is bubbling and crust is pies golden brown. Remove from oven.  Cool and serve.
blog peach hand pie

Recipe: Flaky pie dough for hand pies

October 20, 2012 from Los Angeles Times

2 1/4 cups (9.6 ounces) flour

Generous 1 teaspoon salt

1 tablespoon sugar

1/4 cup cold shortening

1/2 cup (1 stick) cold butter, cut into ½-inch cubes

2 1/4 teaspoons cider vinegar

4 to 6 tablespoons ice water, more if needed

To make the dough using a food processor, pulse together the flour, salt and sugar until thoroughly combined. Add the shortening and pulse until incorporated (the dough will look like moist sand). Add the butter and pulse just until the butter is reduced to pea-sized pieces. Sprinkle the vinegar and 4 tablespoons water over the mixture, and pulse a few times to form the dough, then a few more times just until the dough begins to clump together to form a cohesive dough. If the dough is too crumbly and dry, pulse in additional water, 1 tablespoon at a time. Remove the dough and mold it into a disk roughly 6 to 8 inches in diameter. Cover the disk tightly with plastic wrap and refrigerate at least 2 hours, preferably overnight.

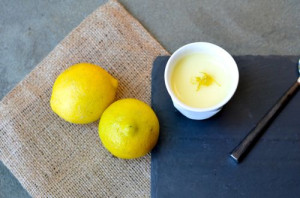
Lemon Posset

blog lemon posset


Here is a perfect summer dessert both simple and delicious. It takes just minutes to make and then several hours in the refrigerator, using only three ingredients: cream , sugar and lemon. This yummy treat has the texture and consistency of a silky pudding. I consider this is a virtual food magic trick. So intrigued by the results, I did a little on line research to learn about possets. The name posset which seems to be a reference to the small saucepan they are prepared in, first appeared in Britain during the 15th century. In those days a posset was a hot beverage of curdled milk mixed with wine or ale, often spiced. By the 16th century, the recipe evolved to cream, sugar and citrus juice. With refrigeration, the posset evolved to a cold dessert. I suggest you try this recipe soon and enjoy the pleasures of a simple lemon posset. 

From by the bay, wishing you lemony food memories!
Maryann

Lemon Posset
Serves 6
Ingredients3 cups heavy cream
1 1/4 cups granulated fine sugar, plus 1 teaspoon
6 tablespoons fresh lemon juice
1 tablespoon fresh lemon zest

Directions
In a medium sauce pan add the cream and 1 1/4 cups sugar. Bring to a boil, stirring to dissolve the sugar. Continue to boil for 3 to 5 minutes. Remove from heat and stir in the lemon juice. Pour into 6 ramekins. Refrigerate until set, at least 5 hours. To serve mix the lemon zest and sugar together to top each portion.

Ideas for serving Lemon Posset:
1. with fresh berries
2. with whipped cream
3. with cookies – such as shortbread or amaretti
4. with a berry sauce, such as blueberry or raspberry

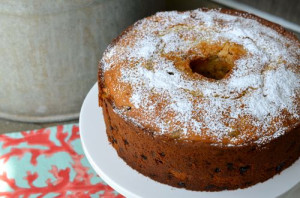
Raisin Pound Cake

blog raisin cake
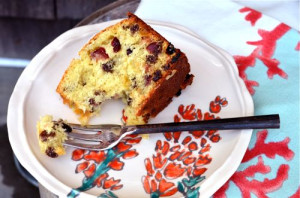
As I was thinking about what to write for my Mother’s Day blog, I decided to look through my Grandmother’s recipes. I love looking at the tattered, fragile pieces of paper, remembering the recipe, the family gathered for some occasion or just an ordinary day made special with the love that comes along with the food. The recipes are all hand written, many of them just a list of ingredients mostly for baking. I figured this is all Grandma needed if that, it’s in baking that you need the precise measurements. Most of Grandma’s recipes were committed to memory. Each time I try a recipe it’s requires a bit of work for me to figure out the technique to transform the ingredients in the recipe. So as I was looking through the recipes, I found this recipe for raisin cake. I have no idea the origin of the recipe, but what I do know that making the cake for my sister and mother while working on this blog, we not only enjoyed the cake but all the memories that came along with it.
From by the bay , wishing you a Happy Mother’s Day making your own special memories.
Maryann
blog raisin cake slice
Raisin Pound Cake
Ingredients
Unsalted butter and unbleached all-purpose flour or baking spray for the tube pan
3 cups unbleached all-purpose flour, plus 2 tablespoons
3 teaspoons baking powder
1/4 teaspoon kosher salt
1 pound raisins
1 cup (1/2 pound) unsalted butter, at room temperature
1 1/2 cups superfine sugar
4 eggs, beaten
1 cup whole milk
1 tablespoon grated lemon zest
1 tablespoon grated orange zest
confectioner’s sugar, to dust on top of cake

Directions

Thoroughly butter the bottom and sides of a tube cake pan then coat the sides of the pan with flour, shaking out the excess or spray the sides of the pan with a baking spray.


Make the cake: In a saucepan add raisins and water until the raisins are just covered and bring to a boil. Strain raisins, discarding liquid and cool in a bowl.  After raisins have cooled, add 2 tablespoons of flour to coat the raisins. Preheat oven to 350 degrees F. Sift the flour, baking powder and salt into a bowl. Set aside. In an electric mixer, cream the butter until smooth. Add the sugar gradually, beating until well blended. Add the eggs one at a time, beating well after each addition and scraping down the sides of the bowl once or twice. Beat in the lemon and orange zest. Alternately, add the flour and milk , then the raisins. Pour batter into the greased tube pan. Place on a baking sheet and bake cake for 1 hour and 15 minutes or until a tester comes out of the cake clean. Place tube on baking rack until cool. Use a knife to loosen sides and remove outer rim. Loosen cake around the tube. Take a sheet of parchment paper slightly larger then the cake and cut a hole in the middle to place tube through. Flip cake over into the parchment paper carefully.  Place on top of cake stand. Put the confectioner’s sugar in a sieve and dust the surface of the cake lightly with it. Serve.

Maple Panna Cotta

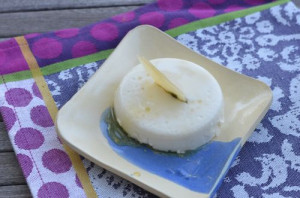
As I was thinking about some of my favorite flavors to welcome Fall, of course maple syrup comes quickly to mind. I decided to incorporate the maple taste into an easy elegant dessert – panna cotta, This is a dessert that I enjoyed many times on my visits to Florence, Italy. Maple seems a nice way to give it an american touch. For many years, I was reluctant to try panna cotta, it seemed daunting , using gelatin leaves and then removing from the mold before serving, but was I wrong , this dessert could not be easier to make.  If removing your panna cotta from the mold is preventing you from trying this lovely dessert then don’t bother. You can serve your dessert in some other little containers such as little jam jars as I did below, or a tea cup or pretty glass. If you are feeling ambitious serve some pepita brittle along side the dish. As always enjoy!
From by the bay wishing you sweet maple food memories!
Maryann
blog maple panna cotta
Maple Panna Cotta
Serves 6
Ingredients
2 cups heavy cream
1/4 cup granulated sugar
1/4 cup maple syrup ( optional extra for serving )
3 sheets gelatin leaves
vegetable oil
Directions
Prepare 6 – 4 ounce custard cups by lightly oiling them with canola oil. Place the gelatin sheets in a bowl and cover with water. Set aside. In a medium saucepan add the cream, sugar and maple syrup . Place on medium heat and cook until sugar is dissolved , stirring occasionally.  Remove from heat. Remove the gelatin sheets from the water, gently squeeze to remove excess water. Add to the sweetened cream. Stir until dissolved. Ladle into the custard cups. Cover and refrigerate until firm, several hours or overnight. To unmold, run a knife under hot water, wipe it dry and then run the knife around the panna cottas and invert onto plates. Serve immediately, with a little maple syrup on top.
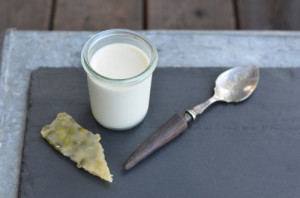
Optional: if you don’t want to unmold the panna cotta serve in the custards cups as is or in
another glass or porcelain container. I like to use a small glass jelly jar.
blog maple panna cotta 2

Irish Coffee Apple Caramel Crisp

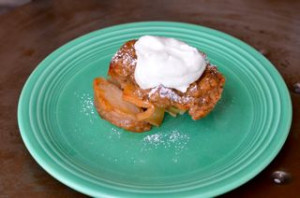
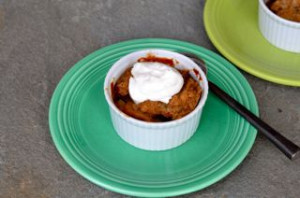
I love traditions, but sometimes we need new ones. I wanted to make a dessert that delivered just a subtle hint of Irish Coffee to celebrate St. Patrick’s Day. This Irish Coffee Apple Caramel Crisp does just that! Apple and caramel is a perfect marriage of flavors. There is just a touch of coffee in this rich caramel apple filling, topped with a crunchy crumb. The crisp is covered with a cloud of irish whiskey whipped cream.  It’s hard to make whipped cream taste better but using a touch of irish whiskey or bourbon does just the trick.  This is the perfect topping to any dessert. When you combine all the these flavors you have a winning dessert perfect for any
celebration. You can start a new tradition too!
From by the bay wishing you a Happy St. Patrick’s Day!
Maryann
blog irish apple crisp
Irish Coffee Apple Caramel Crisp
Serves 6
Ingredients
Filling
3 apples such as Gala, peeled, cored and sliced
2 tablespoons unsalted butter
4 tablespoons light brown sugar
1 tablespoon coffee
1/4 teaspoon salt
Topping
3/4 cup all purpose flour
5 tablespoons light brown sugar
1/2 teaspoon cinnamon powder
1/8 teaspoon salt
6 tablespoons melted unsalted butter
Directions
Preheat oven to 375 degree F. In a bowl mix all toppings ingredients together, making moist clumps. Place in refrigerator to chill. To make filling, add butter and sugar into a saute pan on medium heat until smooth sauce forms. Add coffee to pan and cook, stirring until caramel starts to thicken and foam, about 5 minutes. Add salt and then apples. Toss the apples until coated evenly about 1 minute. Divide filling between 6- 4 ounce ramekins, placed on parchment lined baking sheet. Remove topping from refrigerator and divide the crumb topping over each ramekin. Place into the oven for about 1 hour. The crisp should be golden brown and the filling bubbling. Let stand to cool for at least 30 minutes. Serve warm or at room temperature.
Irish Whiskey Whipped Cream
Ingredients
1 cup heavy cream
2 teaspoons confectioner’s sugar
1 tablespoon Irish Whiskey
Directions
In a large bowl whip the heavy cream into soft peaks. Add the sugar and whiskey to the cream and continue to whip into hard peaks. Place into refrigerator and serve cold. ( Do not make too far in advance, I prefer no longer than an hour).


blog irish apple crisp 2

Mini Peanut Butter Cups

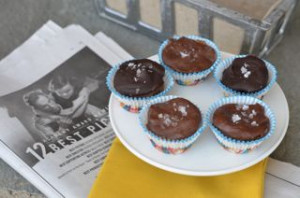
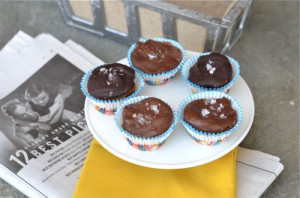
I love movies and like people all over the world, I’ll be watching the Academy Awards to see who will be walking on to the stage to accept each award. It’s fun television and although I might be boring and watching those awards home in my pajamas, I definitely like to make the evening a little bit of an event. I like to serve some champagne while watching and indulge some bit size food, including the dessert. For this year, I’m planning on making these mini peanut butter cups. They are decadently delicious and yet easy to make. Now, let’s get down to business , which film is winning Best Picture??
From by the bay, wishing you starry food memories!
Maryann
blog peanut cup
Mini Peanut Butter Cups
Makes 12 mini cups
Ingredients
2 tablespoons unsalted butter
6 tablespoons smooth peanut butter
6 tablespoons ground graham crackers
2 tablespoons granulated white sugar
1/2 teaspoon ground cinnamon
4 ounces milk chocolate
1 tablespoon heavy cream
1 tablespoons light corn syrup
Coarse Sea Salt , such as Maldon
Baking Spray
Directions
Take a non stick mini muffin tin and spray with your baking spray or line each cup with a paper liner. In a bowl add the sugar, cinnamon and graham cracker crumbs, mix and set aside. Use a glass bowl to microwave peanut butter and butter in 30 second intervals, stirring between each interval until mixture is smooth. Usually, doing this twice will work. Add this mixture to your graham cracker mixture and stir to combine. Use a teaspoon to place mixture into the bottom of each muffin tin. Place filled muffin tin into the refrigerator to set. Now add the chocolate to the microwave and melt using 30 second intervals to stir the melting chocolate 2-3 times should do it. Once the chocolate is melted add the cream and corn syrup. Stir until smooth. Take the peanut butter filled muffin tin and fill with melted chocolate. Sprinkle coarse sea salt on the top. Place back into the refrigerator and let set for another 30 minutes before serving. You can remove the peanut butter cups from the tin and store in a plastic container in the refrigerator until ready to serve.
Variations: to the ground graham crackers , cinnamon and sugar mixture you can omit the cinnamon and add 1 teaspoon unsweetened cocoa powder to have a chocolate peanut butter bottom, or you can use bittersweet chocolate instead of milk chocolate and omit the light corn syrup to top your peanut butter cups.

food peanut cup 2

White Chocolate with Pink Peppercorns

blog white peppercorn choco
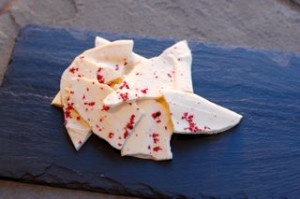
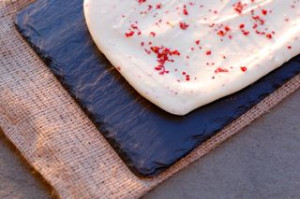
I love homemade Valentine’s, I’ve beem making them since I was a little girl. There is nothing like taking the time to make something yourself to show you care. I thought making a flavored chocolate this year would be fun. I did a little research and testing and came up with this white chocolate base mixed with touch of lemon zest for tang and some ground pink peppercorns to give a little of heat. The two ingredients offer the perfect harmonious taste when mixed with the white chocolate. What better way to say , ” I love you”!From by the bay, wishing you sweet food memories and a Happy Valentine’s Day!
Maryann
blog white choco 2
White Chocolate with Pink Peppercorns
Ingredients
16 ounces white chocolate, finely chopped
2 teaspoons pink peppercorns, ground
1 teaspoon fresh lemon zest
Directions
Line a baking sheet with parchment paper. Place the chocolate in a glass bowl and place in microwave at high for 30 seconds. Remove bowl and stir chocolate with a spatula. Repeat again by placing into microwave for another 30 seconds, remove and stir. Repeat this process until chocolate is melted, which varies althought ususally in total it is 2 -3 times. Stir chocolate until it is completely smooth. Once chocolate is melted add the lemon zest and ground pink peppercorns. Stir well. Pour melted chocolate onto the parchment paper and spread into a rectangle shape. You can top with some additional pieces of pink peppercorn if you like. Place into the refrigerator to cool. Once cool, break the chocolate into large pieces.


Double Chocolate and Toffee Cookies

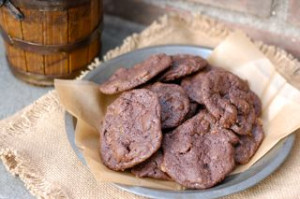
Sometimes, it’s my pantry that inspires an adaption of a recipe or a new combination of tastes. This cookie was inspired while exploring my pantry. I was looking at what candy and chocolate was still lingering from Christmas. Every Christmas we receive a gift of toffee  with almonds and there was still quite a bit still left over , as well as various chocolate bars received as gifts in food baskets or left from the holiday cookie baking. I decided to bake cookies using the leftover sweets. The cookie dough recipe is a favorite of mine from Ina Garten, which results in a cookie that is soft inside but crispy on the edges. I tossed the toffee into a resealable plastic bag and smashed it with a meat tenderizer, a rolling pin would have worked just as well. I created essentially toffee rubble. Along with the toffee, I chopped up the chocolate into pieces the size of large chocolate chips. I like using bittersweet chocolate but any chocolate would work and the proportions could shift and change based on what sweet left overs you have around as long as you have 1 1/2 cups in total to add to the cookie batter. You can get creative with what you want to add, it could be dried fruit and chocolate or chopped nuts and chocolate instead of the toffee. Make this cookie your own, based on what you like to eat! Happy Baking!

From by the bay wishing you , sweet baking food memories!
Maryann

blog double choco cookie

Double Chocolate and Toffee Cookies
Adapted from Ina Garten, “Barefoot Contessa Parties!” published in 2001
Makes 20 to 24 Cookies

Ingredients
8 tablespoons unsalted butter, softened ( 1 stick)
1/2 cup light brown sugar
1/2 cup granulated sugar
1 teaspoon pure vanilla extract
1 egg
1/3 cup good unsweetened cocoa powder
1 cup all purpose flour
1/2 teaspoon baking soda
1/2 teaspoon fine sea salt or kosher salt
3/4 cup bittersweet chocolate, chopped
3/4 cup toffee, chopped

Directions
Preheat over to 350 degrees F. In a large bowl add the butter and sugars. Use an electric mixer and beat ingredients until light and fluffy. Add the vanilla  and the then egg and beat in well. Add cocoa and mix well. In another bowl, sift together the flour, baking soda and salt. Add to the butter mixture slowly and mix at a low speed. Next add in the chopped chocolate and toffee and combine. Drop dough in rounded teaspoons of dough onto parchment lined baking sheets. Bake for 15 minutes and remove from oven. The cookie will appear soft, let cool on the pan a few minutes and it will then take shape. Remove and cool on wire racks. Store in air tight containers.

Eggnog Pudding

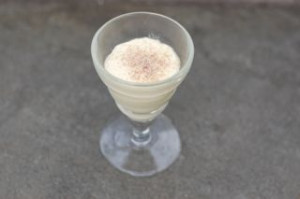
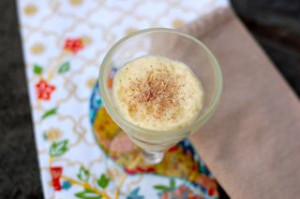
Well the holidays are officially done and I would venture to guess that just like me , you are probably looking at various leftovers when you stare into your refrigerator. As I looked at the carton still half filled with eggnog, I considered several different uses and landed on making some pudding. This was a quick and delicious way to use what was left and give new life to the holiday eggnog!

From by the bay wishing you rich and creamy food memories!
Maryann
blog egg nog pudding
Eggnog Pudding
Serves 4
Ingredients
2 cups eggnog ( if you don’t have 2 cups of leftover eggnog , use milk to get 2 cups of liquid)
1/2 cup fine granulated sugar
1/4 cup cornstarch
1/4 cup whole milk
1 teaspoon pure vanilla extract
optional: nutmeg to sprinkle on top of the pudding
Directions
In a small bowl mix 1/4 cup milk and cornstarch. Mix well until smooth and set aside. Place into a saucepan eggnog and sugar on medium heat and bring liquid to a simmer to dissolve the sugar. Add the cornstarch mixture and continue to whisk until the mixture starts to thicken, it will have the consistency of soft pudding and start to bubble at the edges. Remove from heat, stir in vanilla and continue to whisk to keep the pudding smooth. Pour into 4 serving dishes. Cover the top of each pudding with plastic wrap to prevent from forming a skin on top, pressing wrap directly onto the surface of the pudding. Place into the refrigerator to chill for at least two hours before serving. Sprinkle with nutmeg when serving.

blog eggnog pudding 2

Champagne Cookies

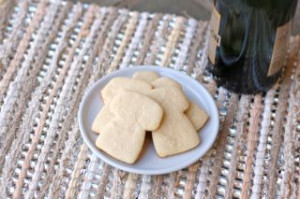
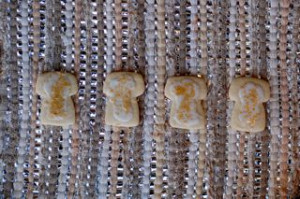
I was looking to make something special for New Year’s Eve and decided to adapt my German Wine Cookie recipe by using champagne in place of the wine. I cut the cookies into the shape of champagne corks and decorated them with a little edible glitz. I love the result and you will too! The recipe is super simple, so give it a try,
From by the bay wishing everyone a wonderful 2013 and a New Year filled with joyous food memories with your friends and family!
Maryann

blog champ cookie 1

Ingredients For Cookies
1/2 cup unsalted butter
1 cup fine granulated sugar
2 eggs
1 teaspoon vanilla
1/4 cup dry champagne
2 1/2 to 2 3/4 cups  all-purpose flour

Ingredients For  Icing

1 cup confectioner’s sugar
2 1/2 tablespoons whole milk
1 tablespoon fresh lemon juice
plus sprinkles or decorative sugar 

Directions
Preheat oven to 375 degrees F. Cream butter and sugar together until light and fluffy. Beat in eggs, vanilla and champagne. Add 2 1/2 cups flour and mix well. Dough will be stiff. If not sprinkle a little more flour in and mix well. Roll out dough, on well-floured pastry sheet, to a 1/4 inch thickness. Cut into desired shapes with cookie cutter.  I prefer to use a champagne cork cookie cutter. Bake on a non-stick cookie sheet for 10 minute, until bottoms just start to brown. Once cookies have cooled, make icing by combining above ingredients. Frost cookies and  top with decorative sugar and or sprinkles, Let icing harden on cookies by sitting on a wire rack. Store in an airtight container. 

blog champ cookie 2